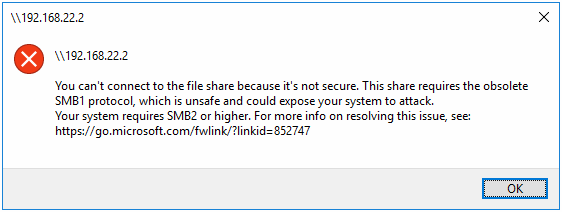
If you try to access an SMB 1 share from Windows 10 you may receive the following error message: You can't connect to the file share because it's not secure. This share requires the obsolete SMB1 …
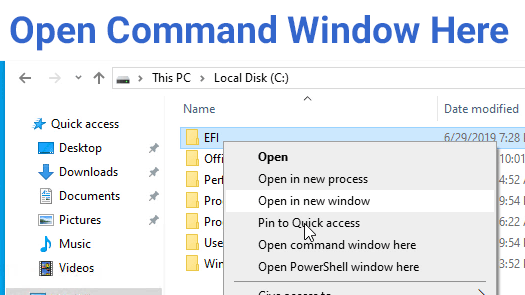
How to add Open command window here to Windows 10 Context Menu
Here is a video showing how to do it in case the above was not clear: …
Continue Reading about How to add Open command window here to Windows 10 Context Menu →
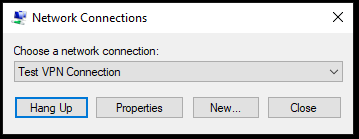
VPN connections do not work after Windows 10 May 2019 Update
I received the latest Windows 10 update today (May 2019 - Build 1903) and found that none of my existing VPN connections worked. When I try to connect to one of them, it just says "connecting" and …
Continue Reading about VPN connections do not work after Windows 10 May 2019 Update →
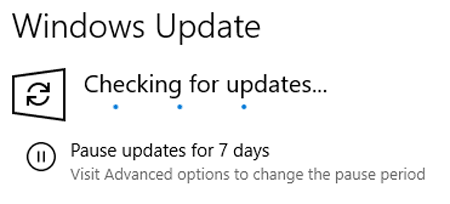
Disable Pause Updates for 7 days feature of Windows 10
The May 2019 update of Windows 10 (version 1903) introduced a new feature which allows users to Pause Updates for 7 days. This post covers how to disable that feature in a domain …
Continue Reading about Disable Pause Updates for 7 days feature of Windows 10 →
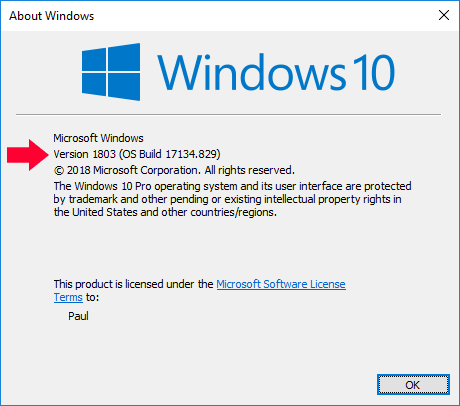
How to check what build of Windows 10 you are on
To check what build of Windows 10 you are on, simply do the following: Press Windows Key + RThis will open the run dialog box.Type "winver"Check out your Windows Build number in the Winver …
Continue Reading about How to check what build of Windows 10 you are on →
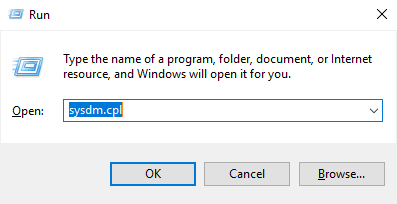
Quickly access System Properties in Windows 10 or Server 2016
Access to the System Properties dialog in Windows 10 and Server 2016 frustrates me when it used to be so easy to access. There are lots of routes to this familiar and useful screen, but I find this …
Continue Reading about Quickly access System Properties in Windows 10 or Server 2016 →