A family member of mine has a Dell Alienware Area 51 r2, which suddenly – stopped working. We tried all sorts of things to get it working again but nothing worked. We eventually came to the conclusion that the BIOS was corrupt. When the power button was pressed:
- The machine switched on and the fans spun up.
- The LED light strips on the front of the case illuminated
But nothing more. There were no post messages, nothing from the bios at all on screen. No beeps, nothing at all. I found some posts about possible BIOS corruption and by gathering all of that information together we were able to bring it back to life. Horray!
We also spoke to Dell, they offered no useful advice, but did offer a replacement motherboard for £280. We felt this was too much money to spend on an this machine.
To save you the hassle of having to find all of the required files, software and guidance I have written it up here and done a video for you:
Table of contents
How to Flash the BIOS of the Dell Alienware Area 51 r2
Because the machine was completely unbootable, it was not possible to flash the BIOS using the hardware itself. So I bought a cheap USB CH341A BIOS programming tool from Amazon. To see if I could reflash the chip using a working machine.
Software and Hardware Requirements
If your Alienware Area 51 r2 is suffering from the same problem and you want to try this out, you will need the following:
- Hardware
- A separate working machine.
- A CH341A Bios Programmer.
- I used a Belkin USB Extension cable, but if your working machine is close, this is not required.
- Software
- CH341SER.EXE – USB to serial driver.
- CH341PAR.EXE – Multiprotocol interface driver.
- AsProgrammer.
- Dell Alienware Area 51 r2 BIOS image.
Once you have installed all of the software. you are ready to continue and setup the hardware.
Connecting the USB Programmer
To connect the my working computer to the the BIOS chip on the Alienware Area 51 r2, I did the following:
- Removed the covers from both sides of the case.
- Completely disconnected the mains power.
- Laid the machine on it’s side with the motherboard exposed.
- Plugged the CH341A USB Programmer into a USB3 port on my working machine.
- Attached the chip clamp to the BIOS chip on the mother board.
I think this YouTube video is worth watching just to get an overview of the CH341 before continuing with the process.
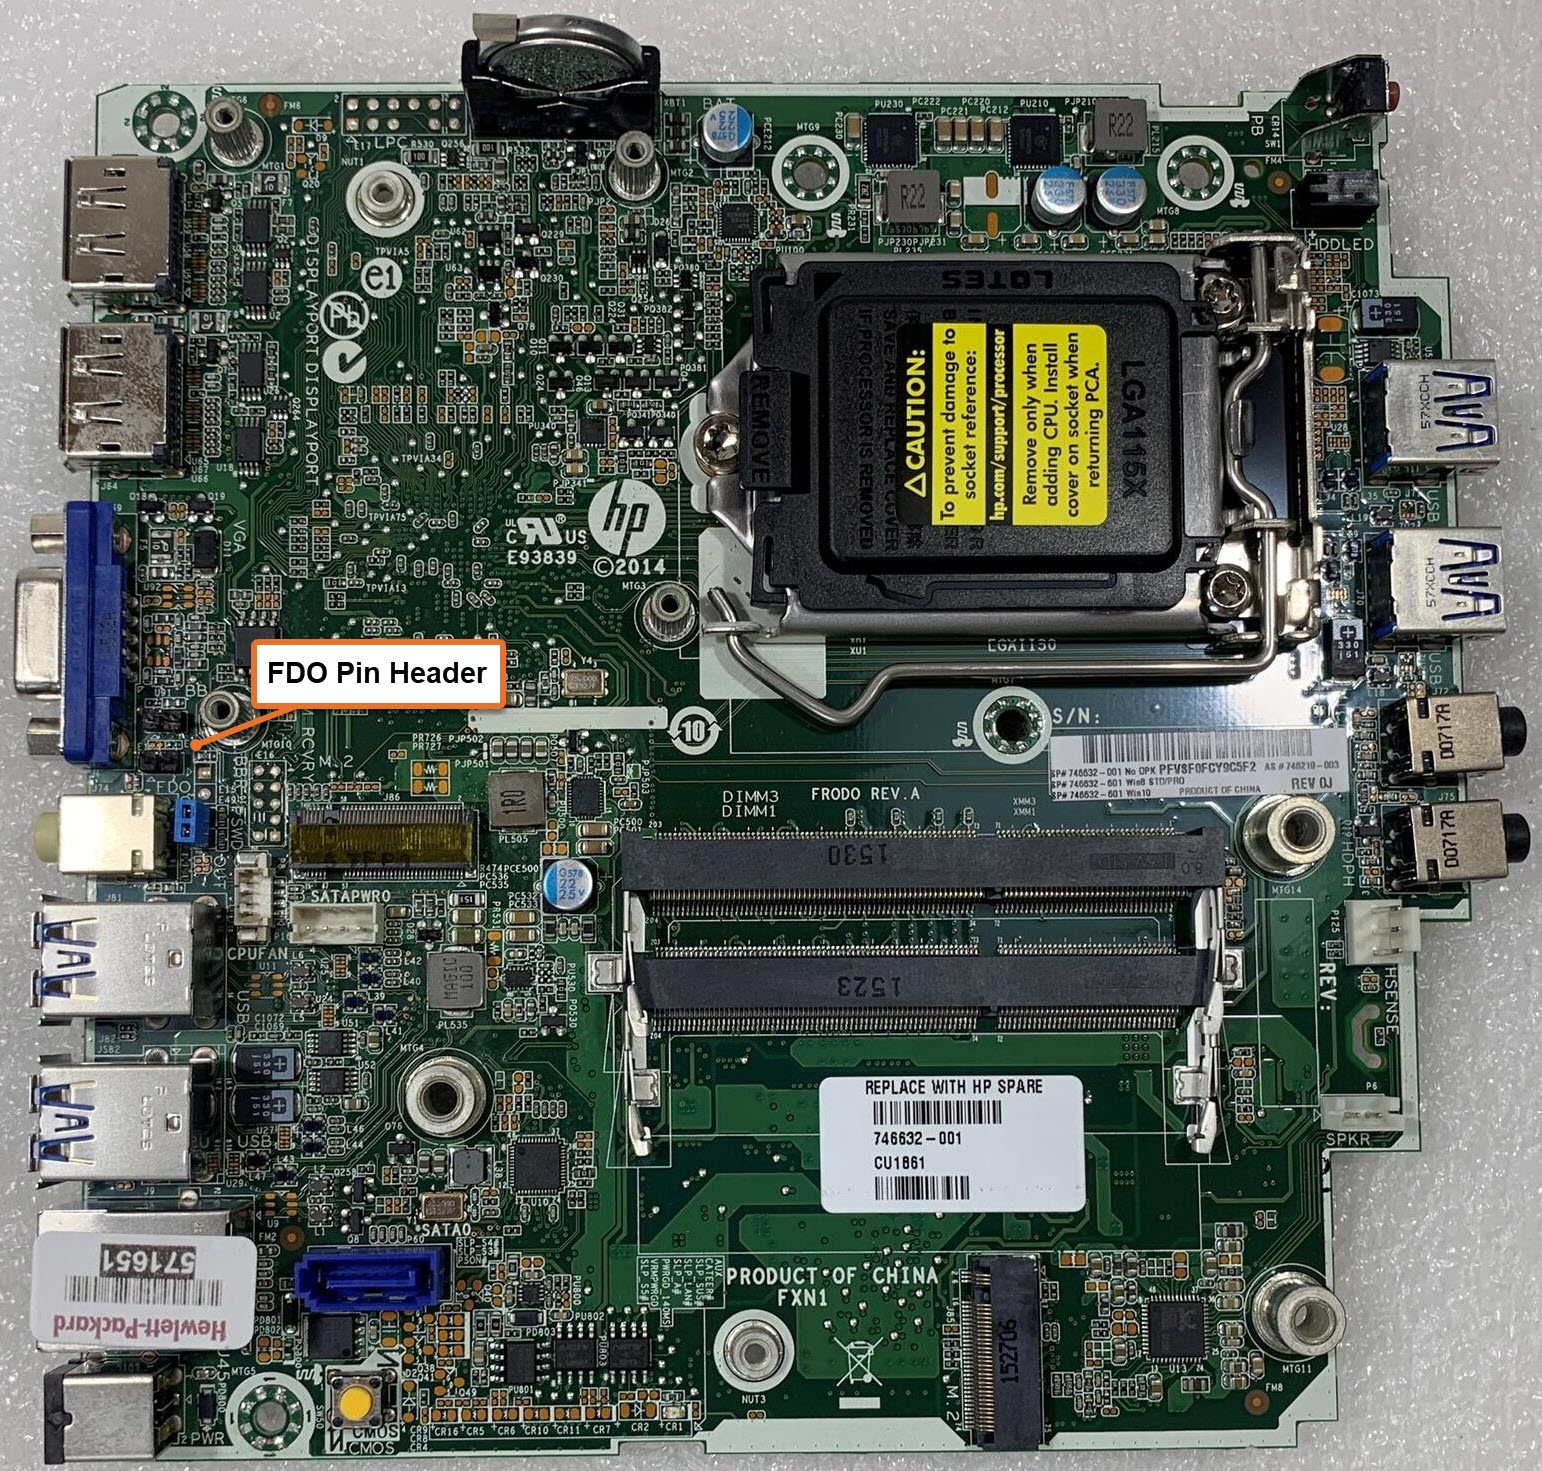
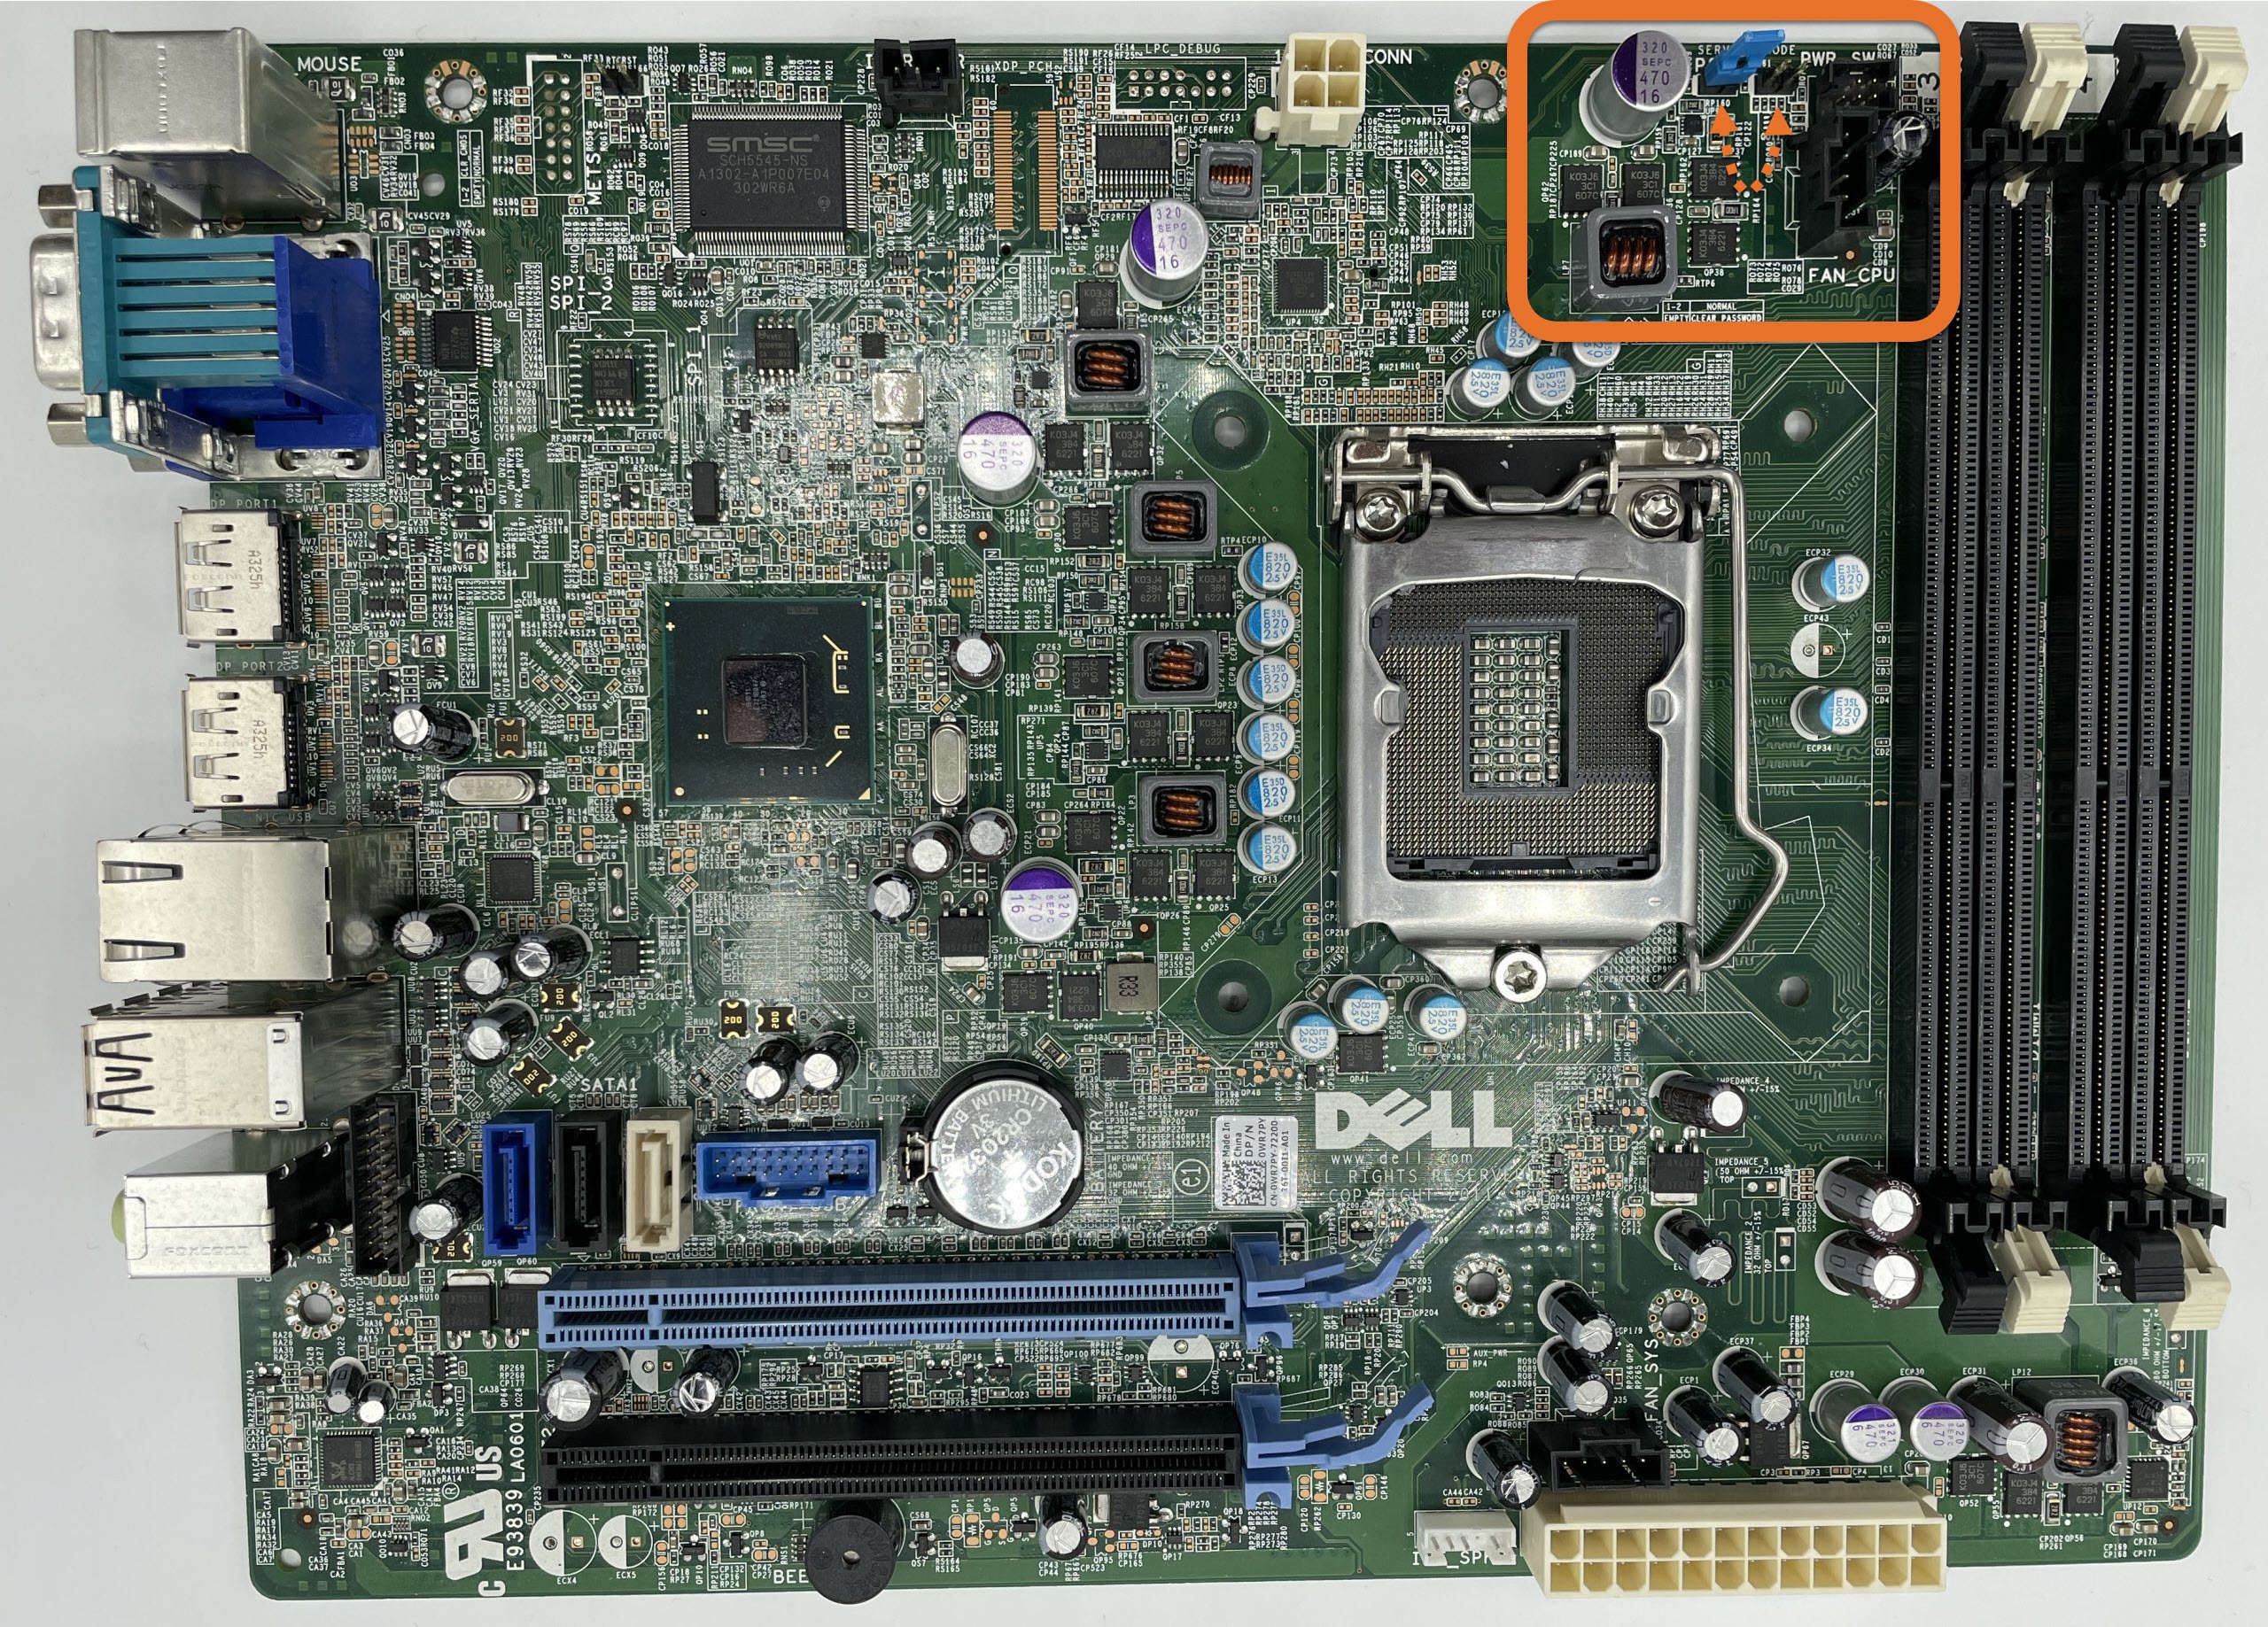
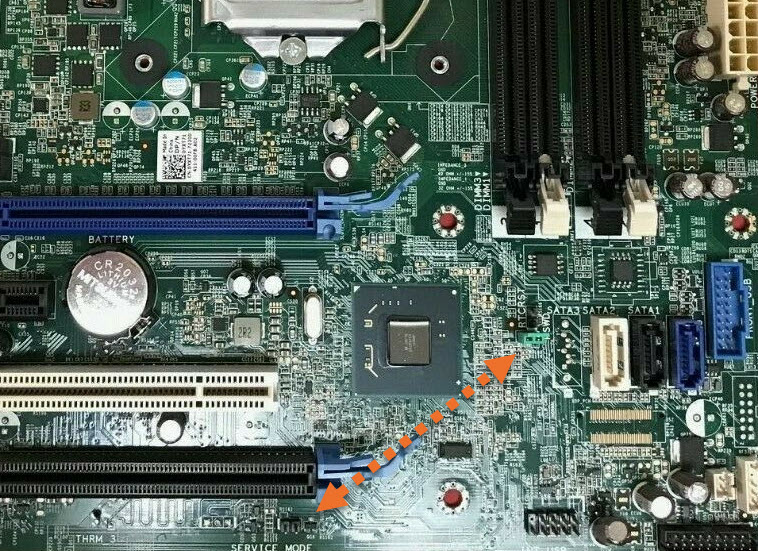
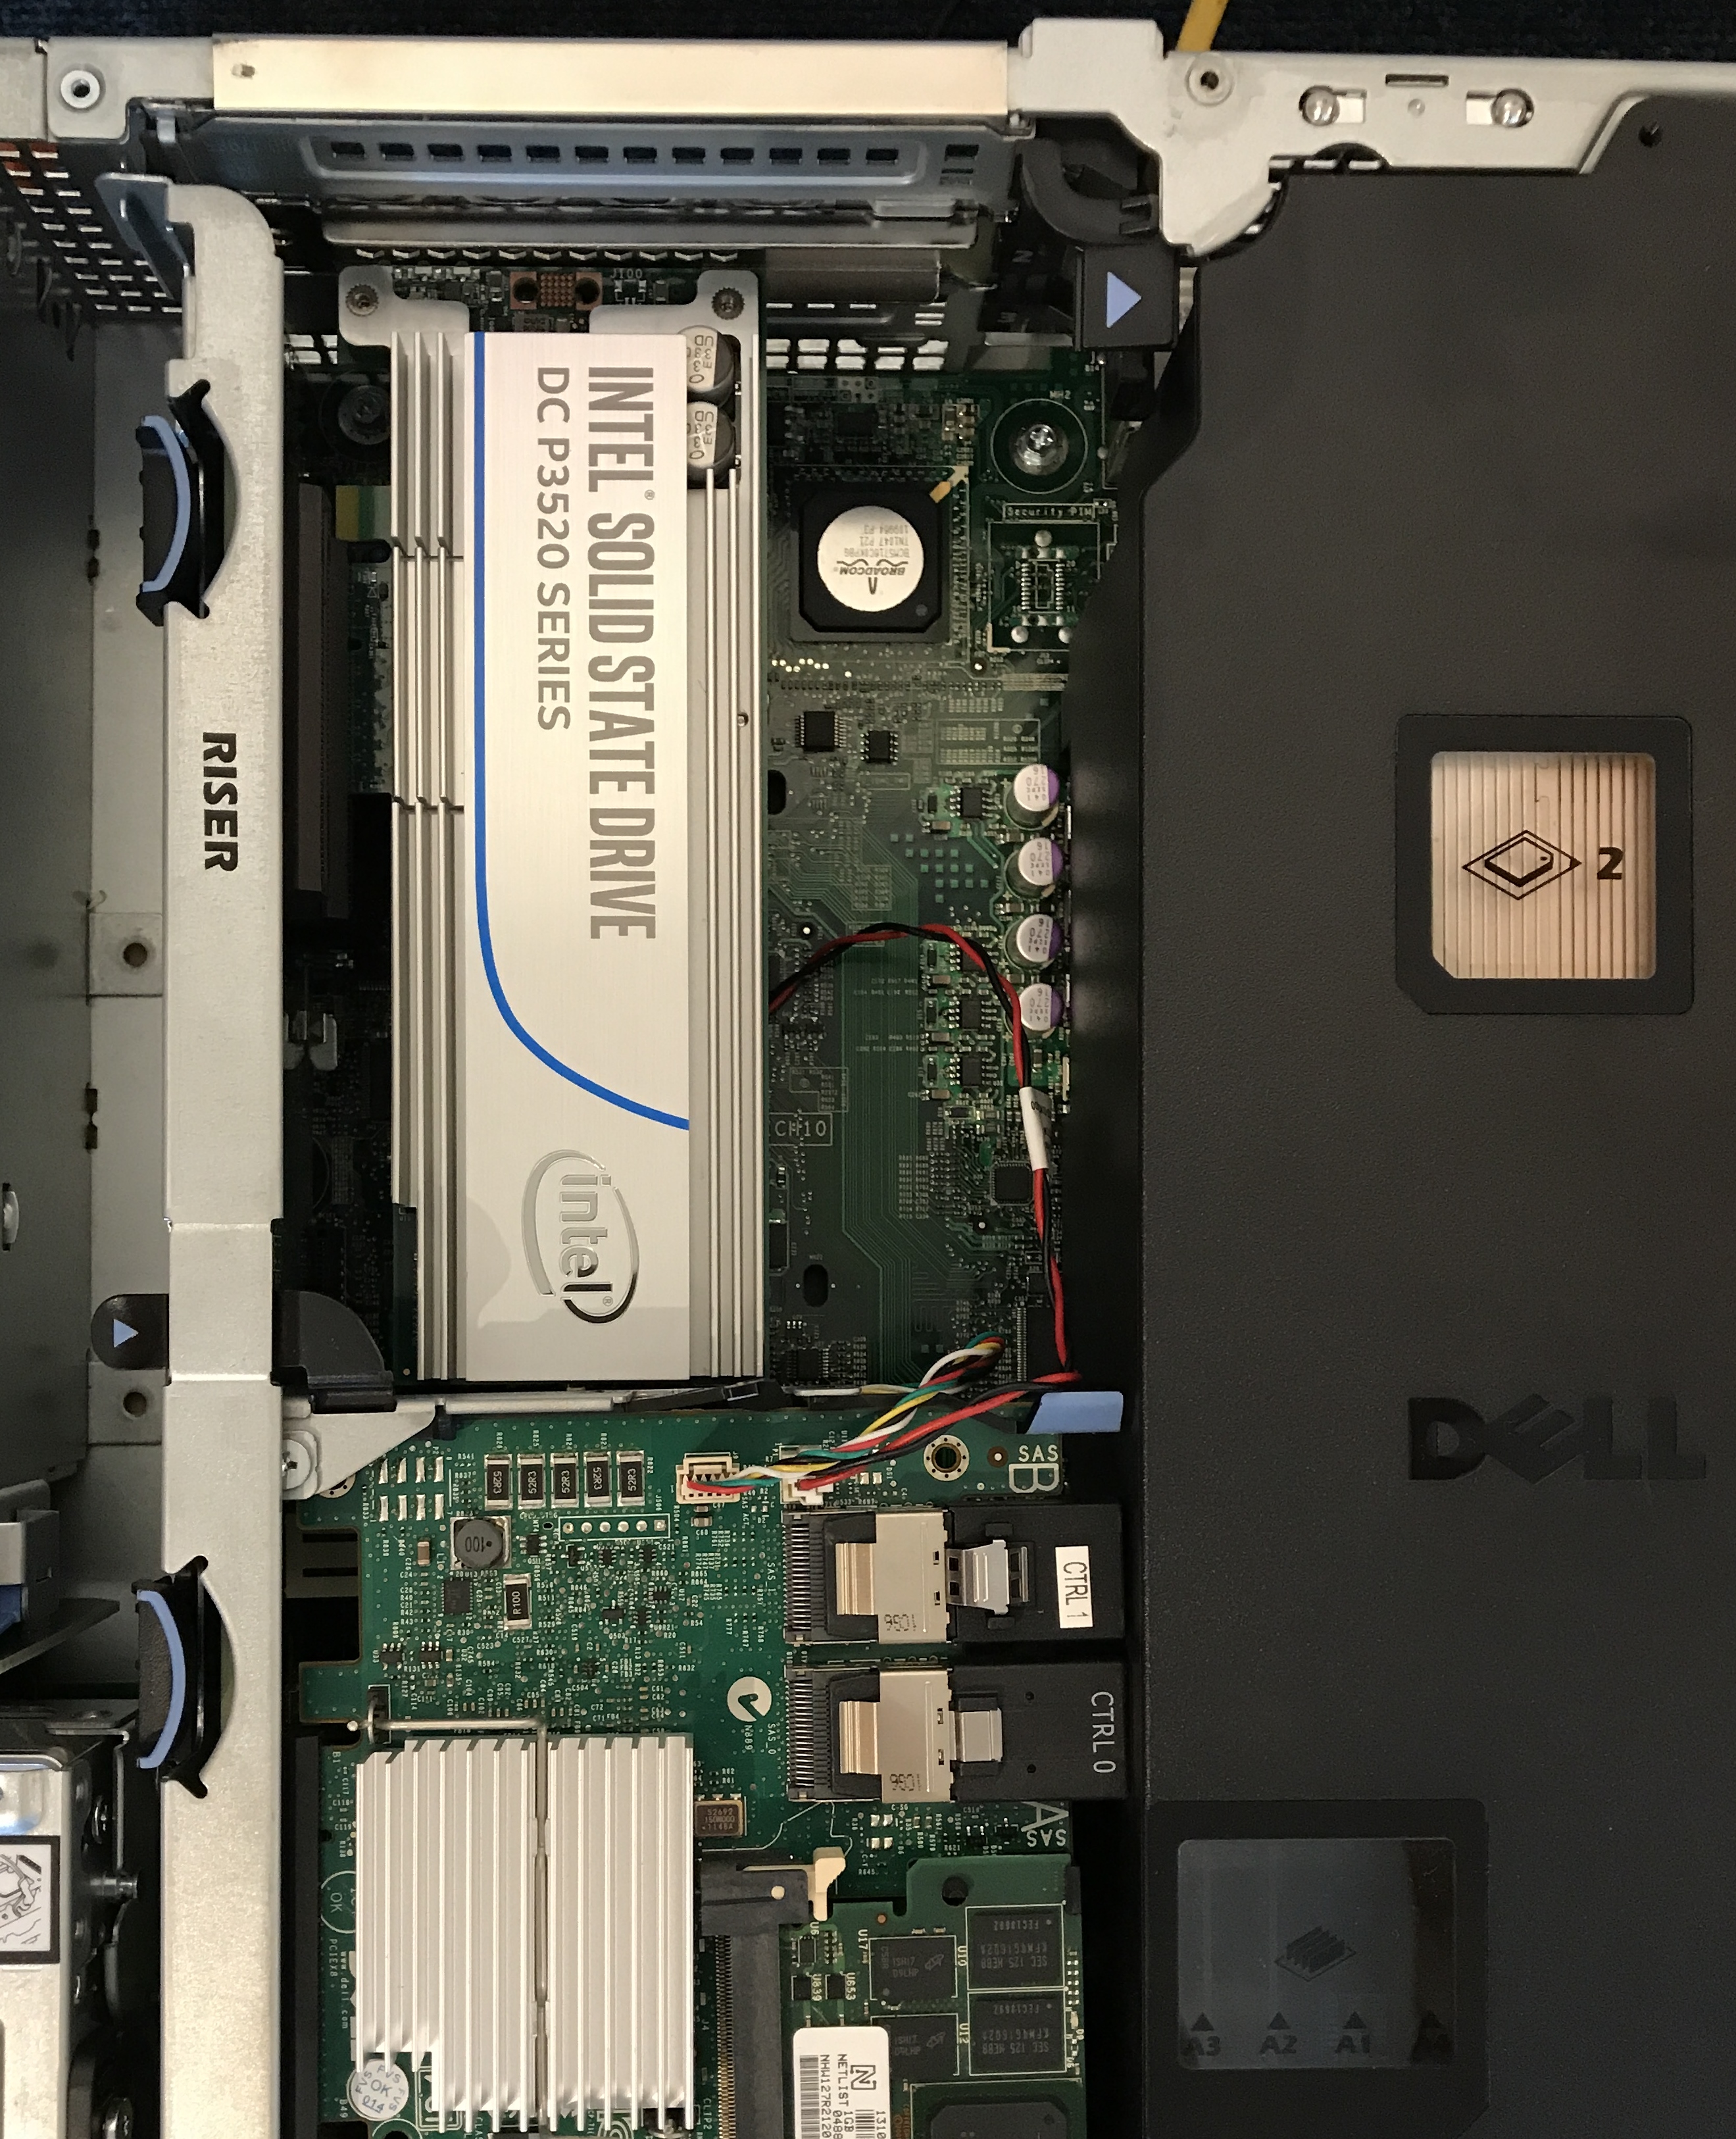
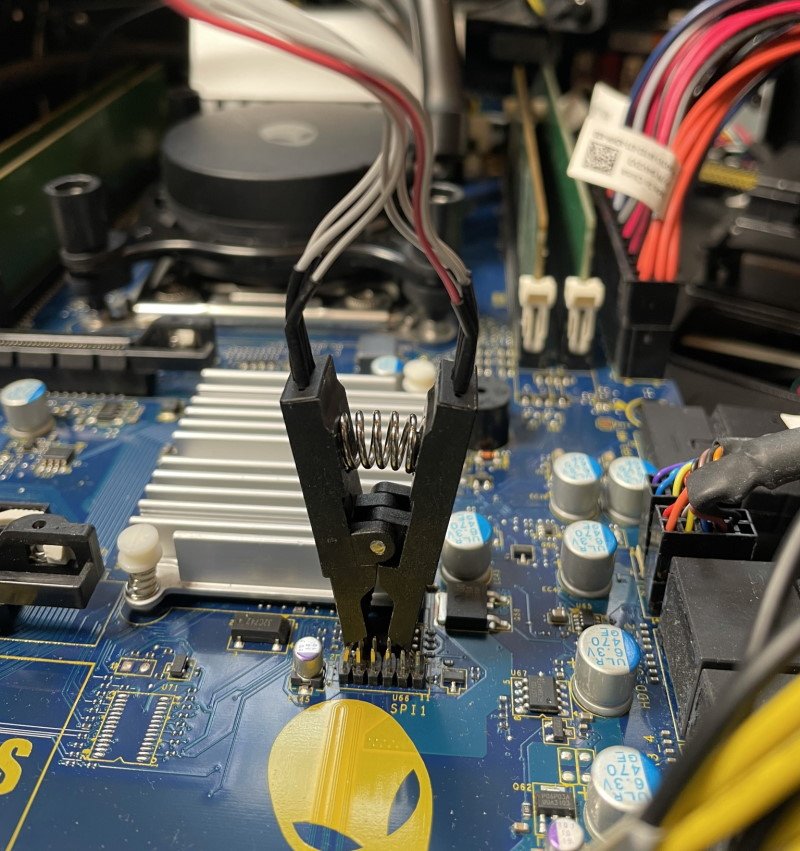
Here is an image of the motherboard that shows the location of the BIOS chip. It is sitting between a heatsink and the printed image of the Alien head. In the image below pin one of the chip is on the bottom right hand side of the chip and it has a small circle to indicate that it is chip 1.

I didn’t change the setup of the USB Programmer out of the box, it looks like this:
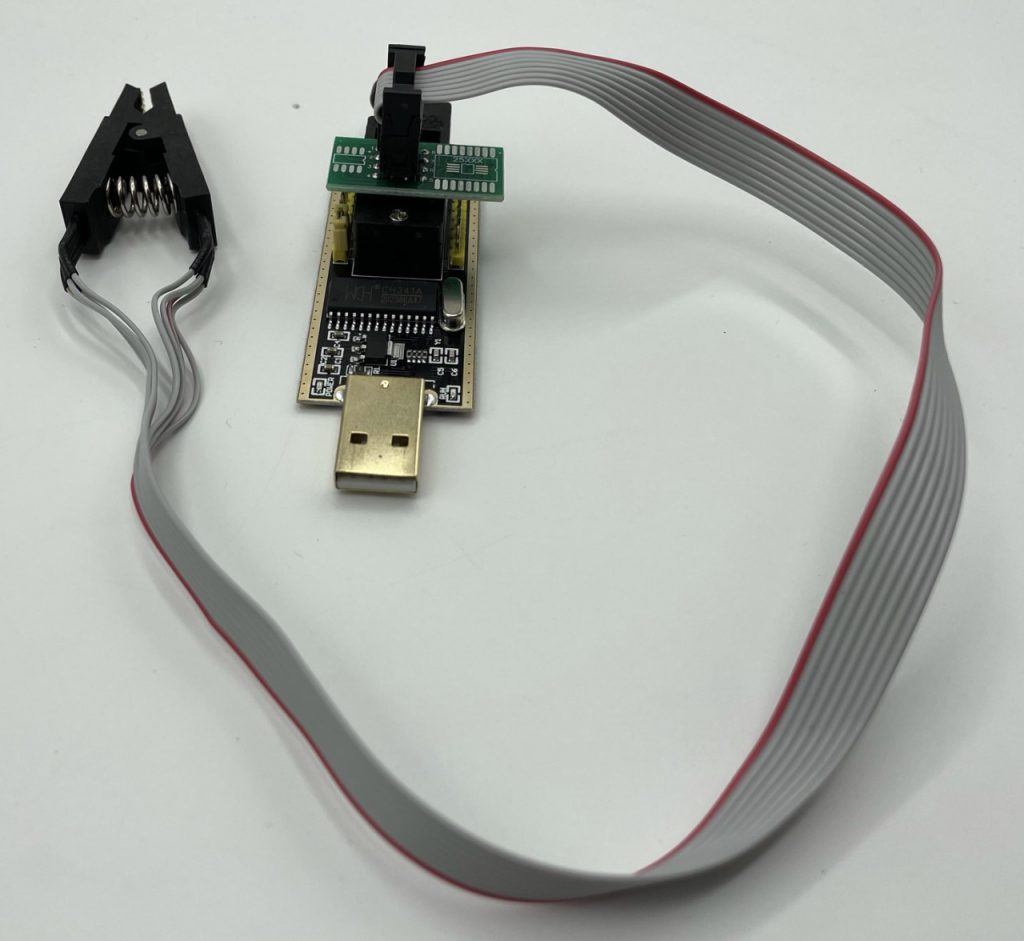
Note the red cable on the ribbon, this also denotes pin one and should be connected to pin one on the BIOS chip. It is quite tricky to get the clamp on to the chip between the heatsink and the SPI1 connector just below it. It took me a number of attempts to get a positive connection. You will know if you have connected it correctly or not in the next step when you fire up the programming tool. ]
Here you can see the clamp connected and it is slightly bending the pins of the SPI1 connector, but I pushed them back after the process was complete:
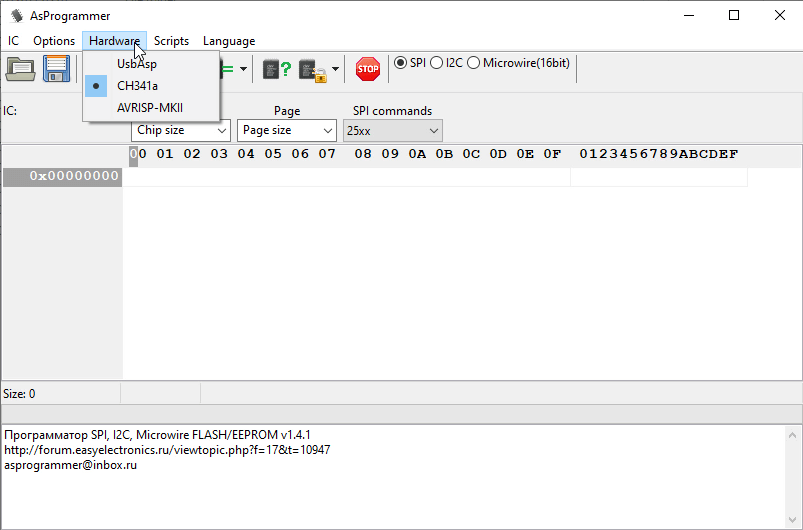
Run AsProgrammer
With all the drivers installed and the hardware connected you can run AsProgrammer. The first thing to do is change the hardware settings to CH341a:
Next, you can ensure the chip is properly connected by clicking on the Read-ID Button:
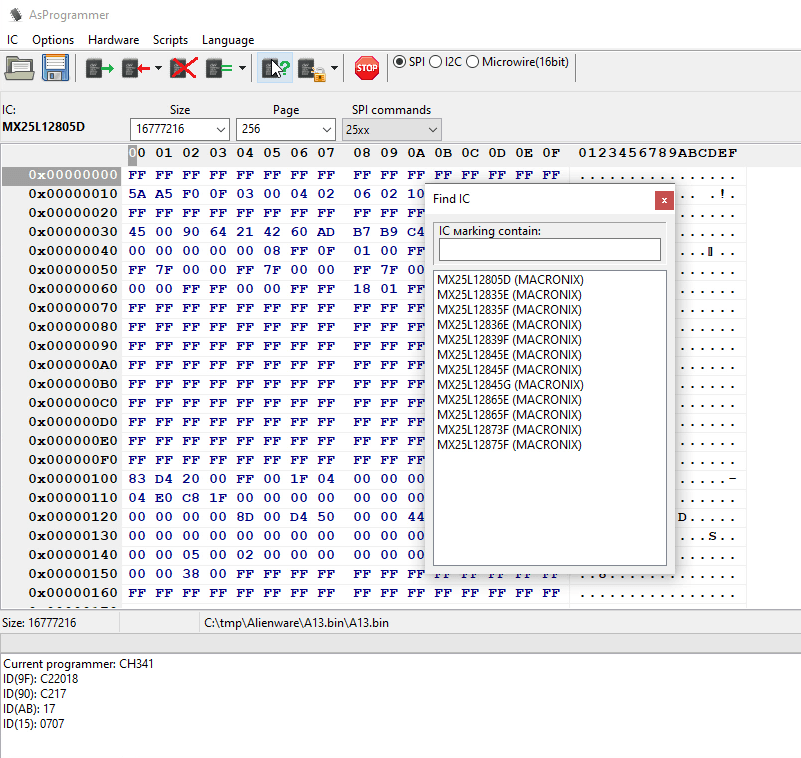
If it brings up a possible list of ICs like the image above, then you are good to continue. I didn’t know what the correct option was, so I just clicked the first one.
If it cannot recognise the chip it will just show this:

When you are sure you have your chip properly connected, you can move on to the next step.
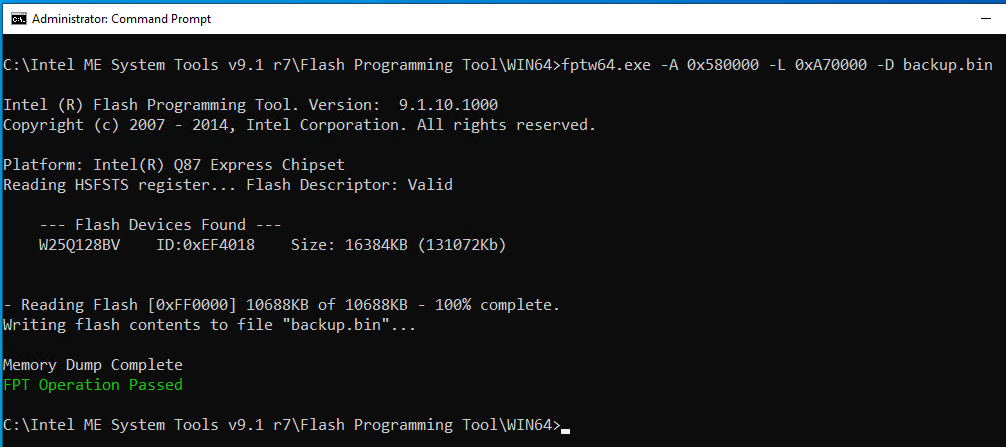
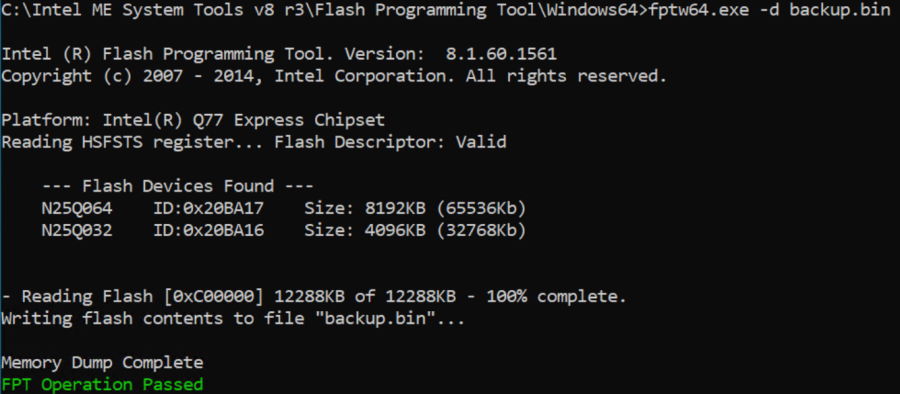
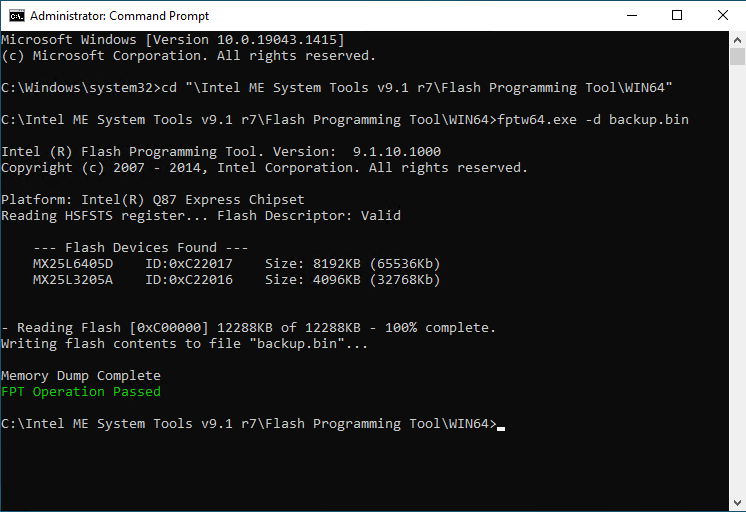
Backup the corrupt BIOS
There seemed to be little value in taking a backup of the current BIOS as it didn’t work anyway. But I took one just in case, and I would recommend you to do the same. It only takes a few minutes and it is only 16Mb.
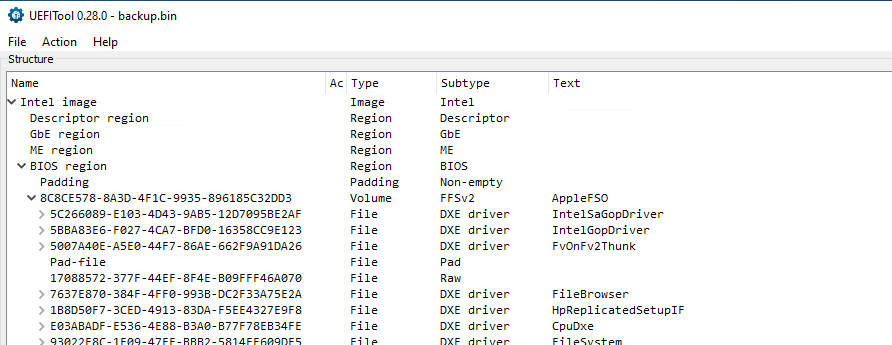
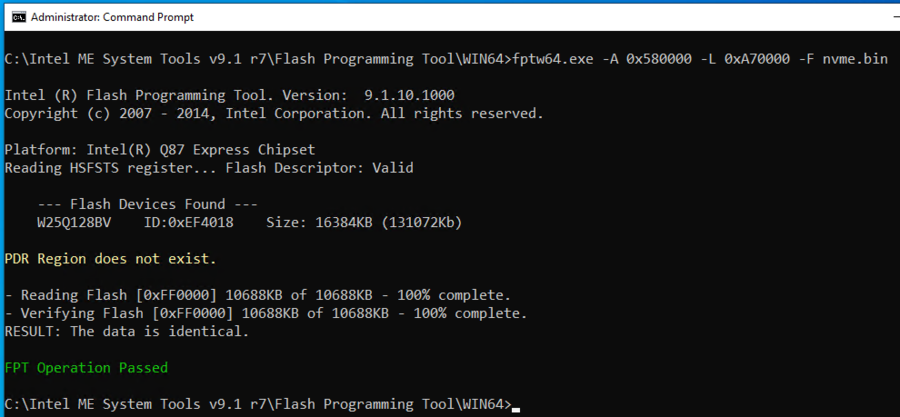
Write the new BIOS
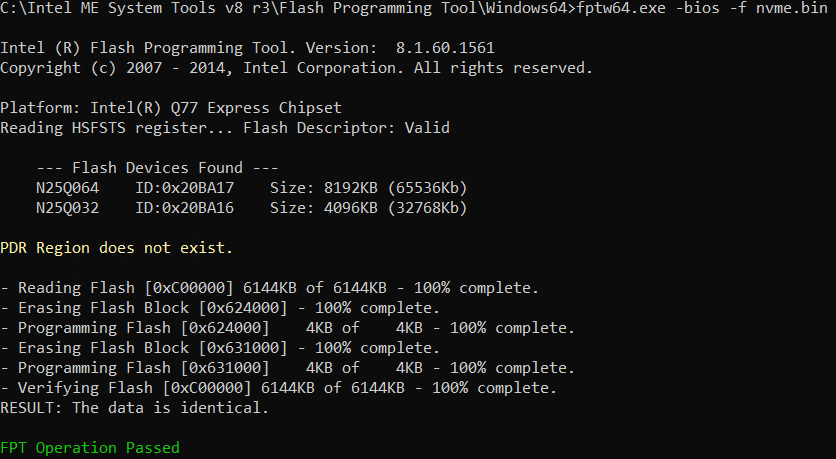
With the existing BIOS backup complete, you can write the downloaded BIOS Image to the chip. Click on the Open File button and then press the down arrow next to Program IC and choose Unprotect -> erase -> program -> verify.
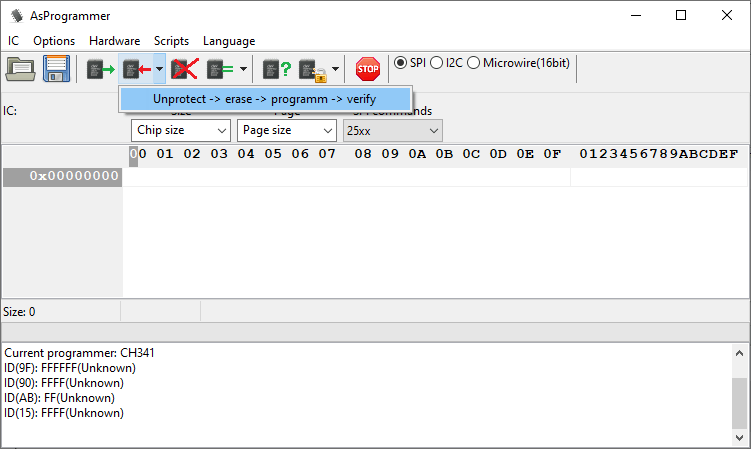
It took about 3 minutes to write the BIOS back to the chip on this machine and AsProgrammer shows a nice progress bar to indicate progress. The USB Programmer itself has a small LED to indicate that it is reading/writing.
Disconnect Programmer and Clear the CMOS
Once the flashing process is complete, disconnected the clamp from the BIOS chip. Then, before trying to boot for the first time, I suggest that you clear the CMOS. Ensure there is no power connected to the machine and then:
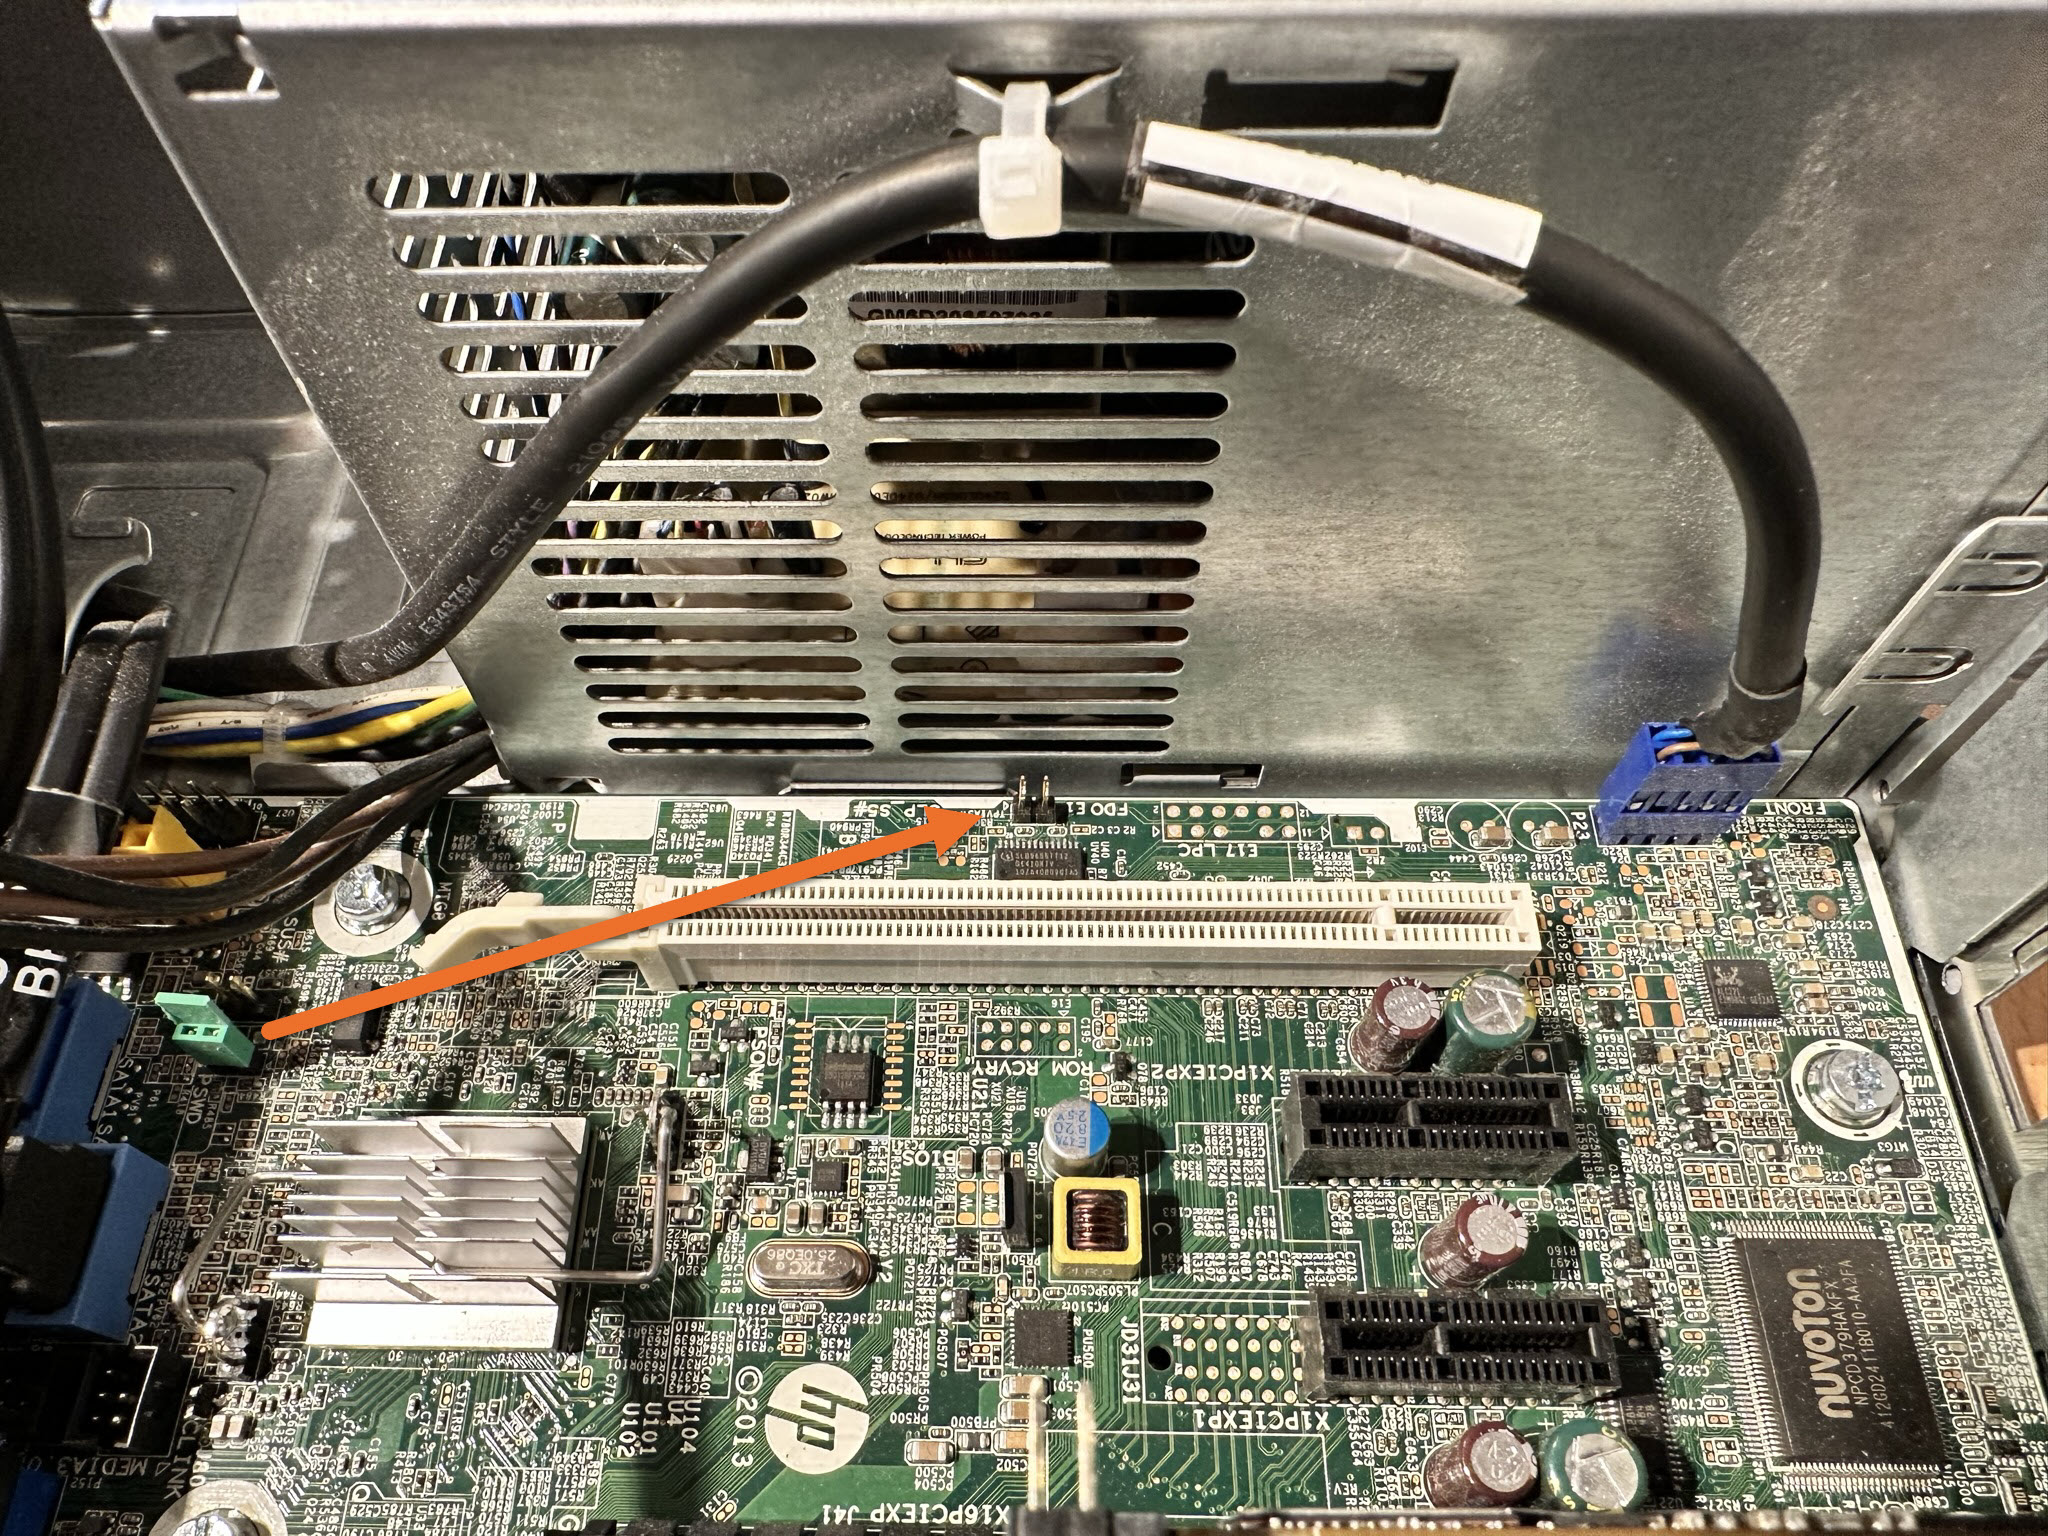
- Locate the CMOS jumper (CLEAR_CMOS1) on the motherboard. It can be found just underneath the coin cell battery.
- Remove the jumper plug from pins 2 and 3 and fix it on pins 1 and 2.
- Wait for approximately five seconds to clear the CMOS setting.
- Remove the jumper plug from pins 1 and 2 and replace it on pins 2 and 3.
You are now ready to try booting the machine for the first time!
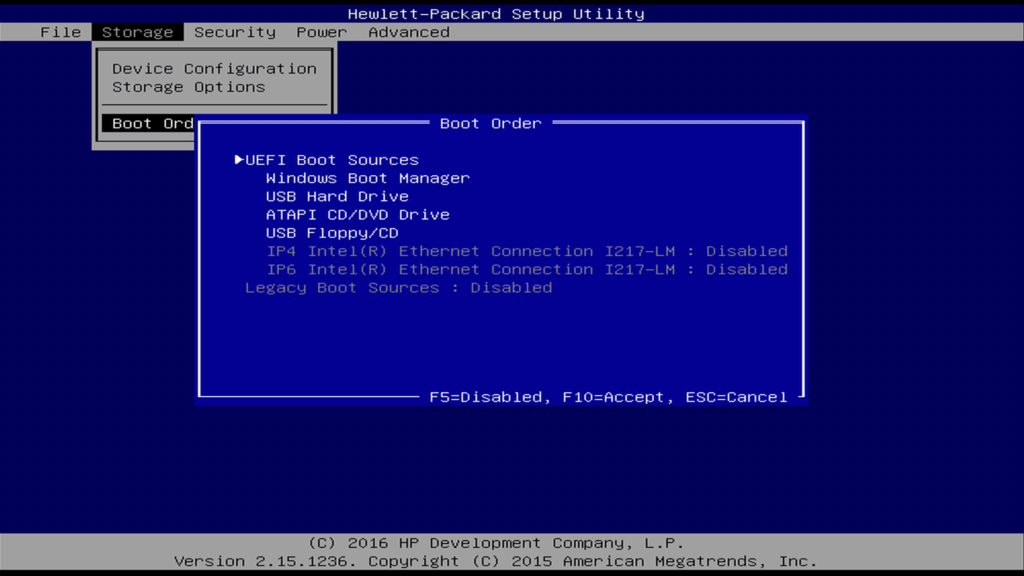
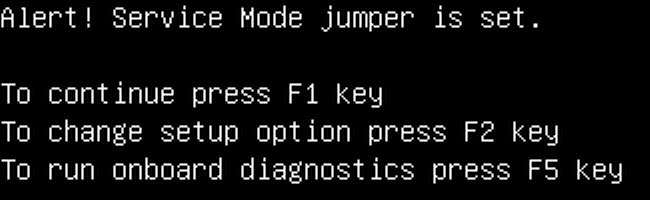
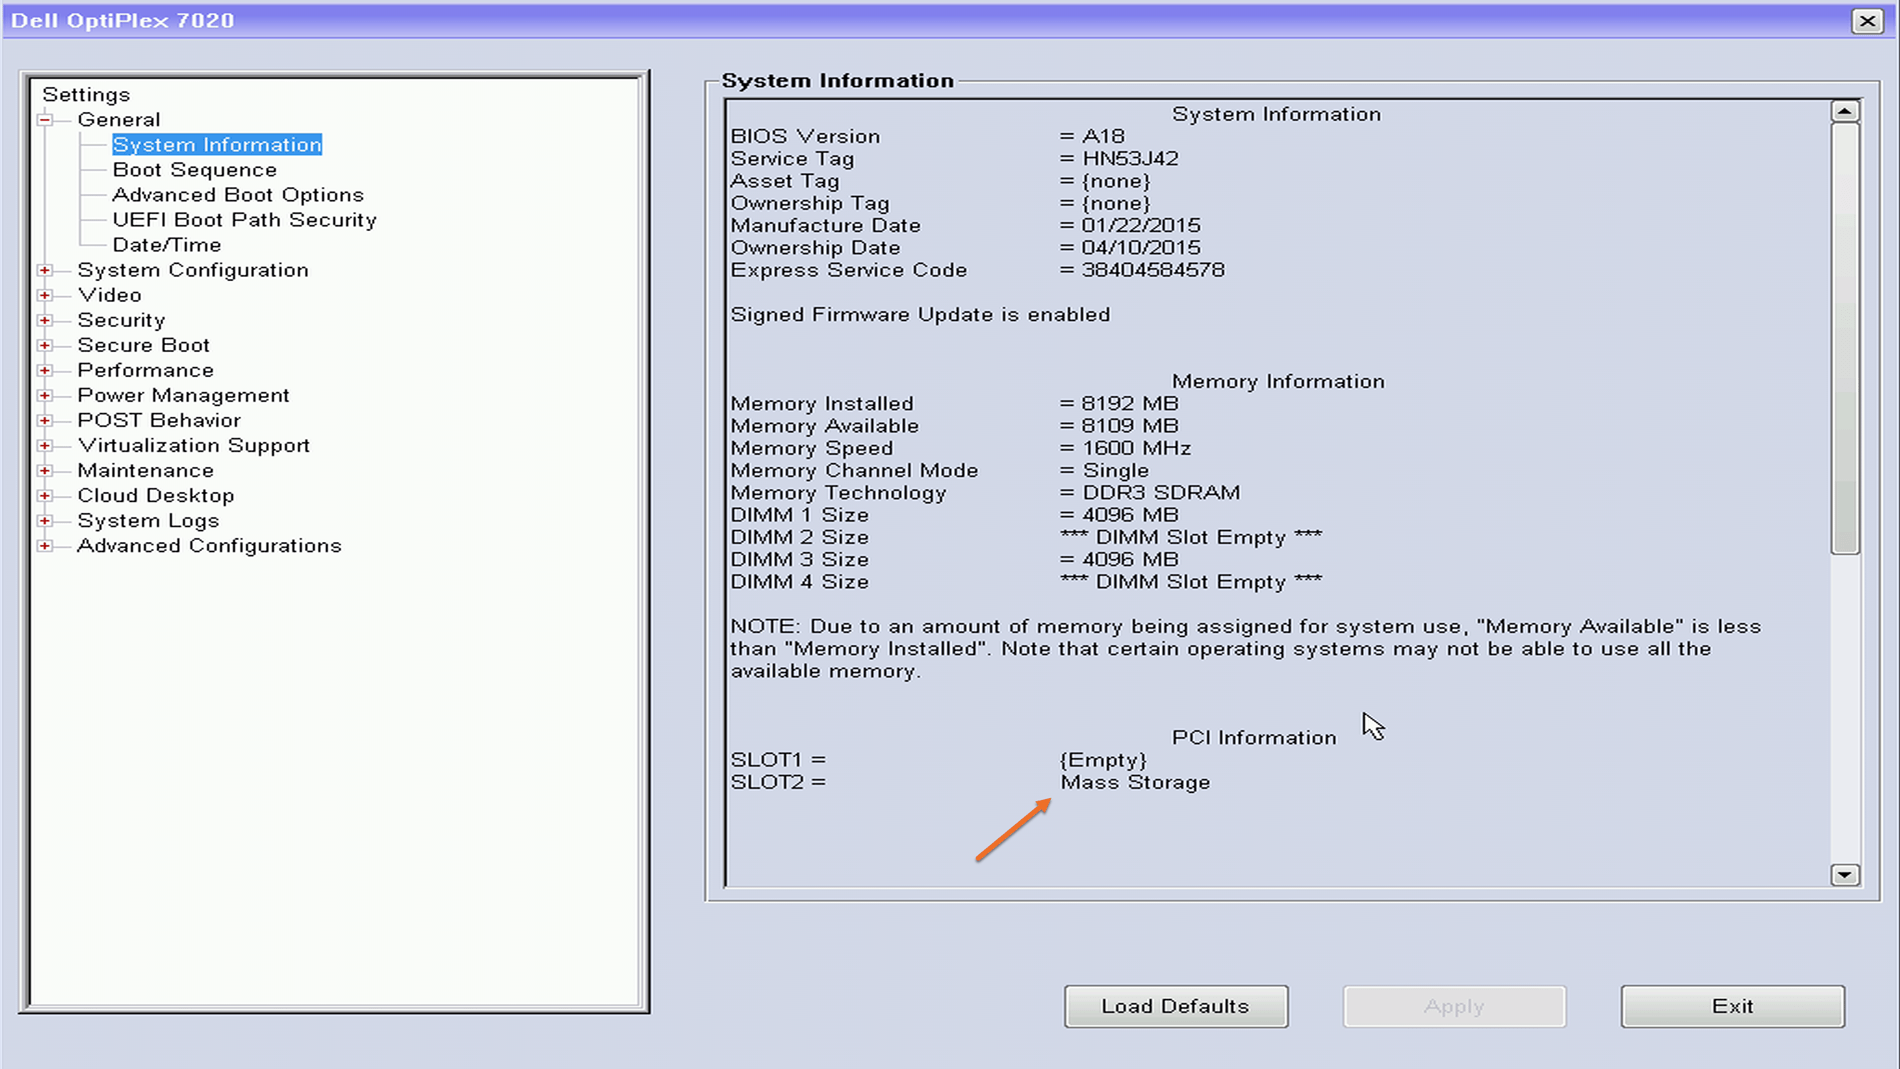
First Boot
The first time I booted the machine it had lost of all its previous settings and returned to defaults. So I setup the basic boot settings again and then the machine was able to boot normally.
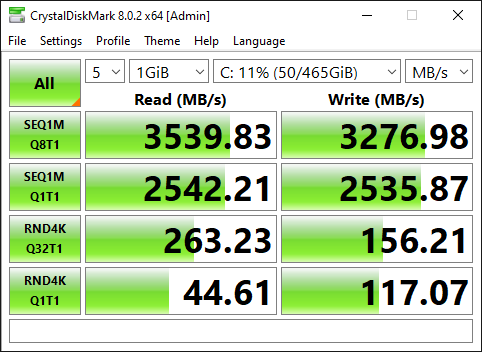
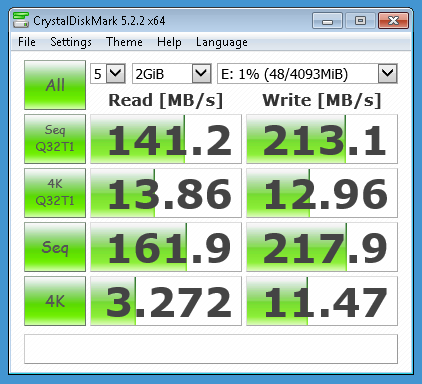
PCIe NVMe Upgrade
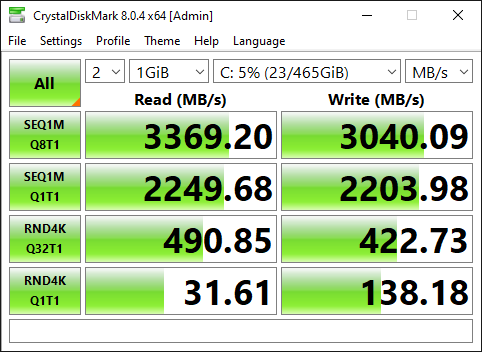
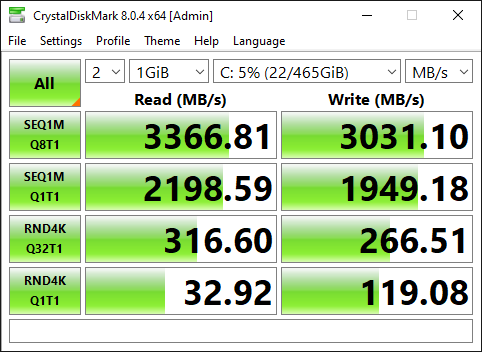
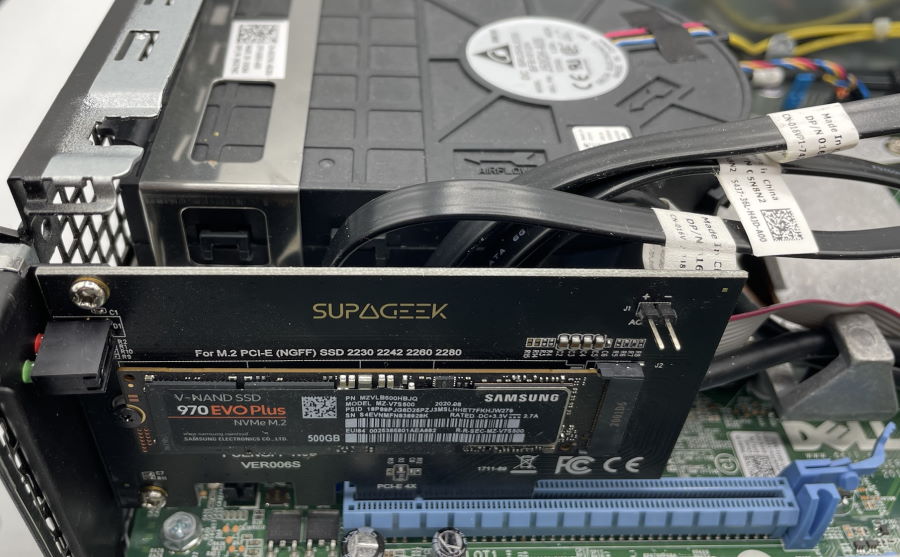
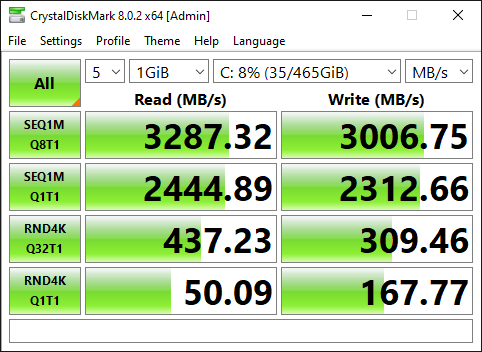
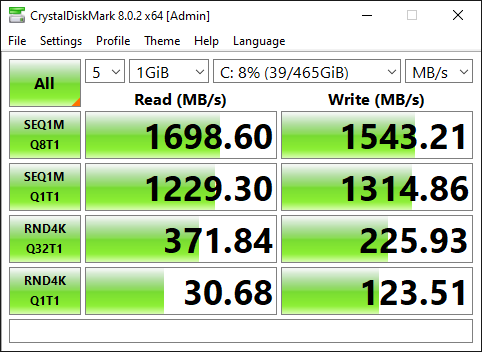
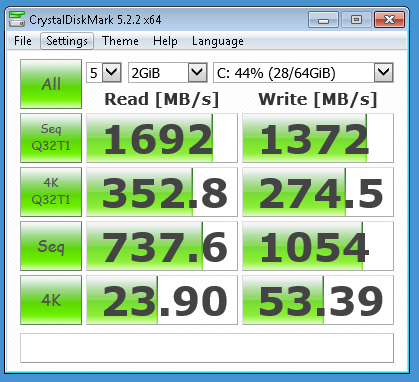
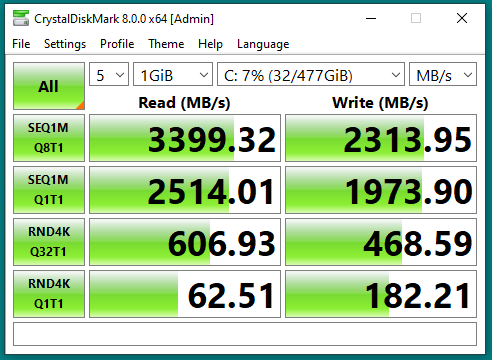
To celebrate the machines renewed life I decided to reinstall Windows on to a Samsung 970 EVOPlus which I had spare, which gave the machine a decent performance boost. Any NVMe drive would provide a big boost in performance over a SATA SSD. These were the figures I got from CrystalDiskMark:
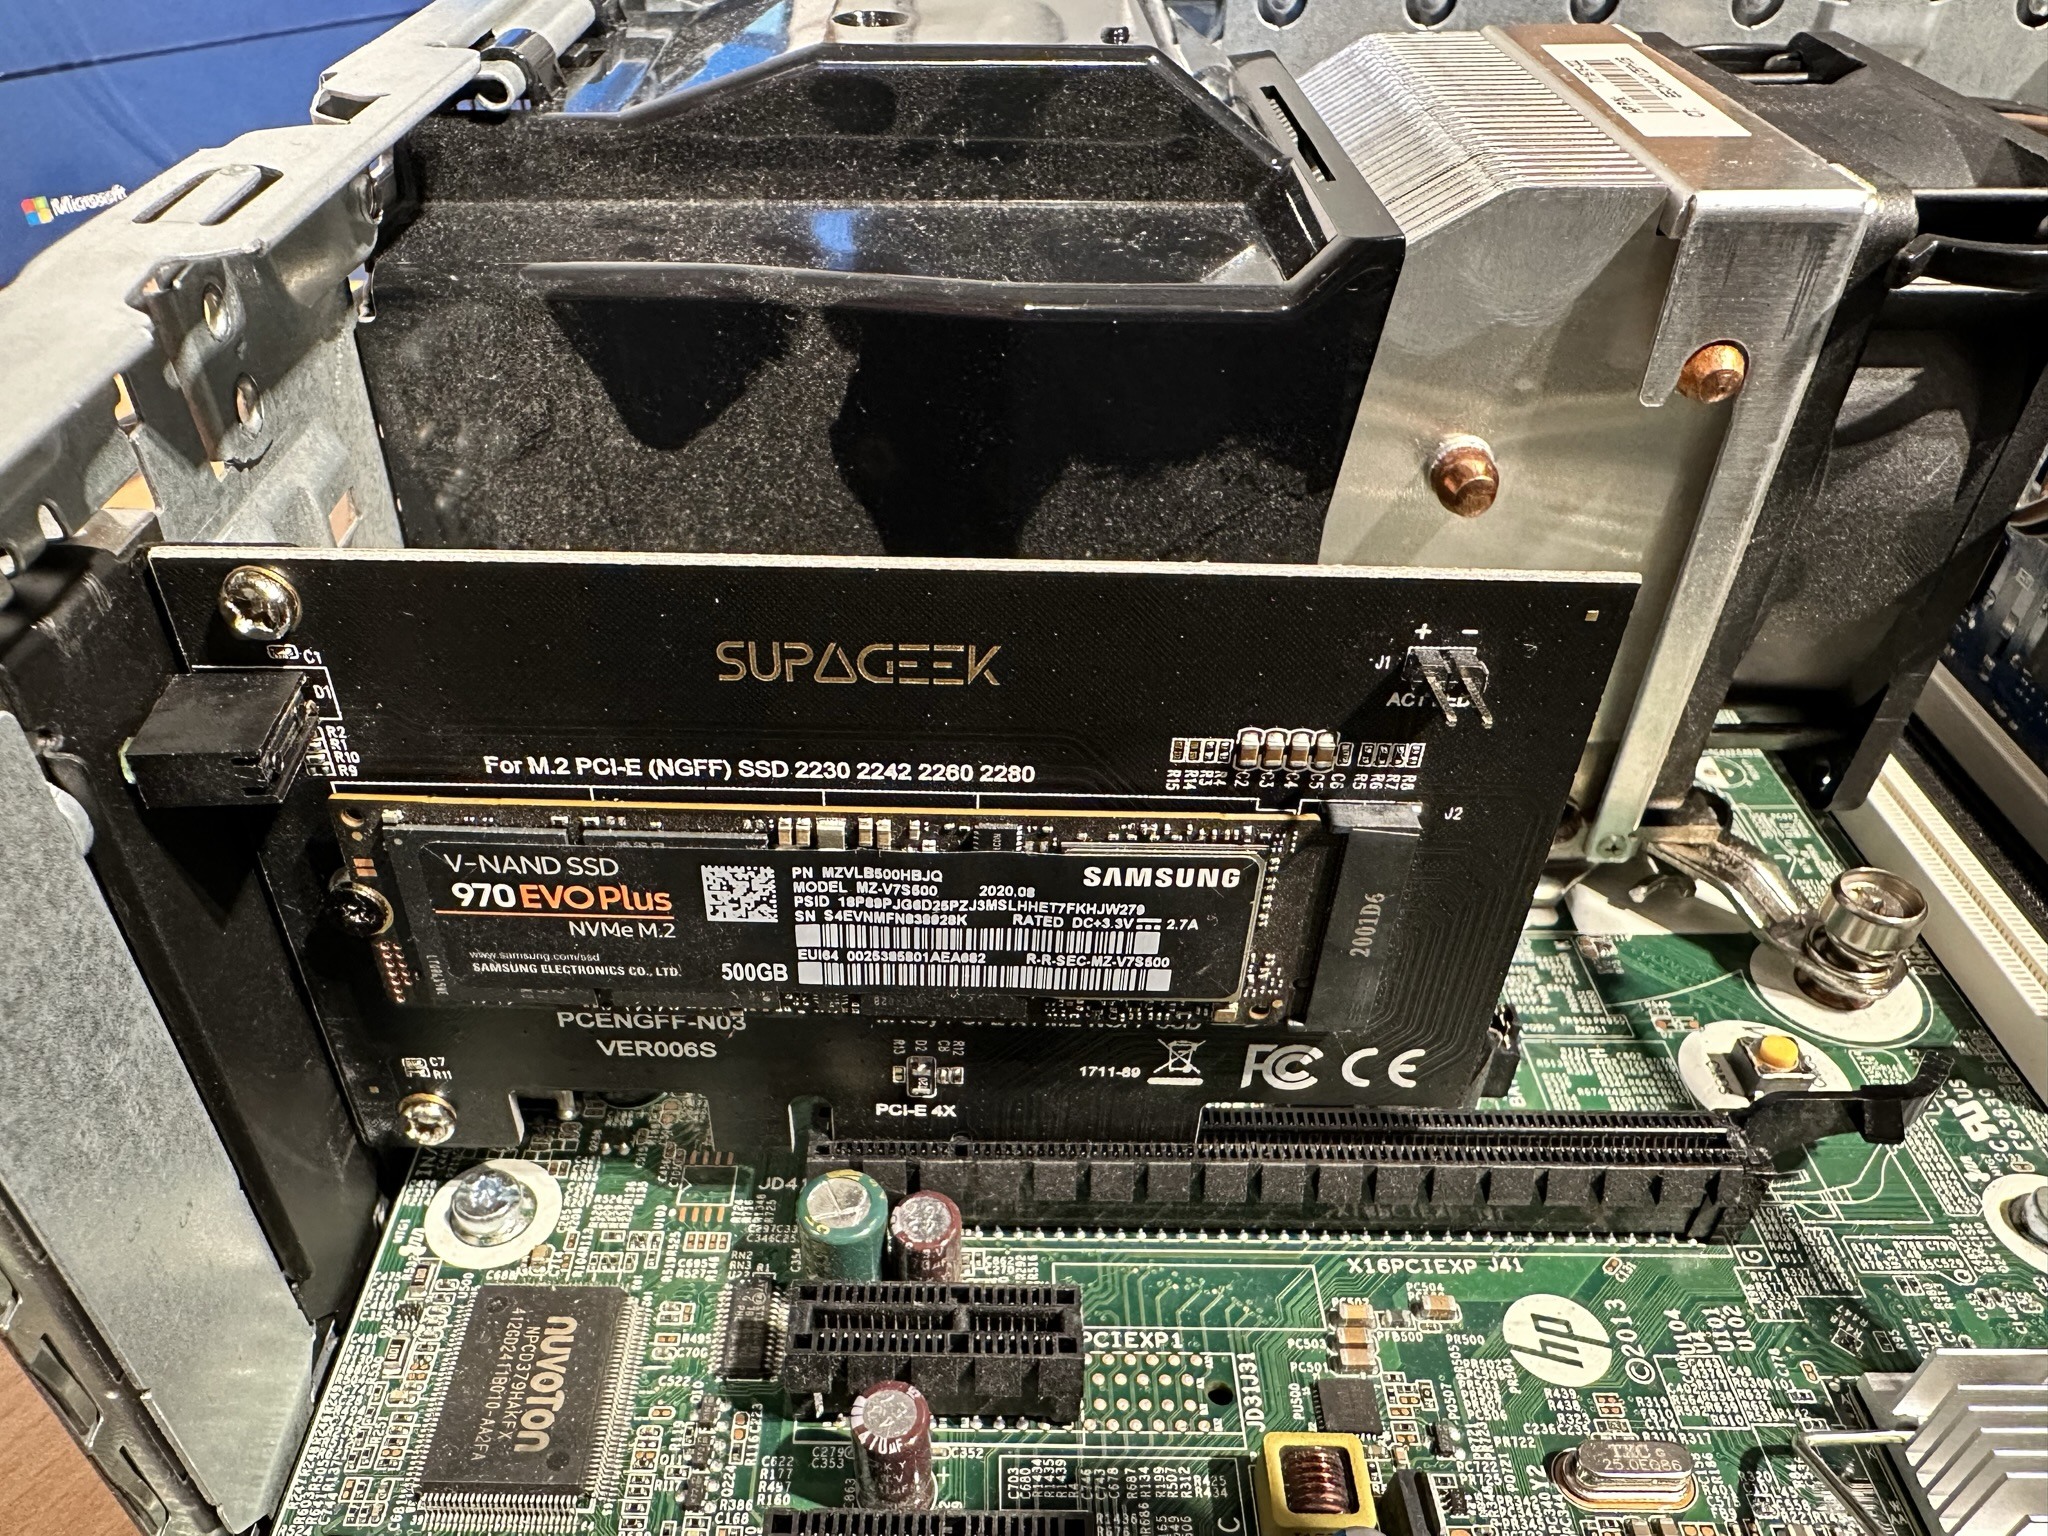
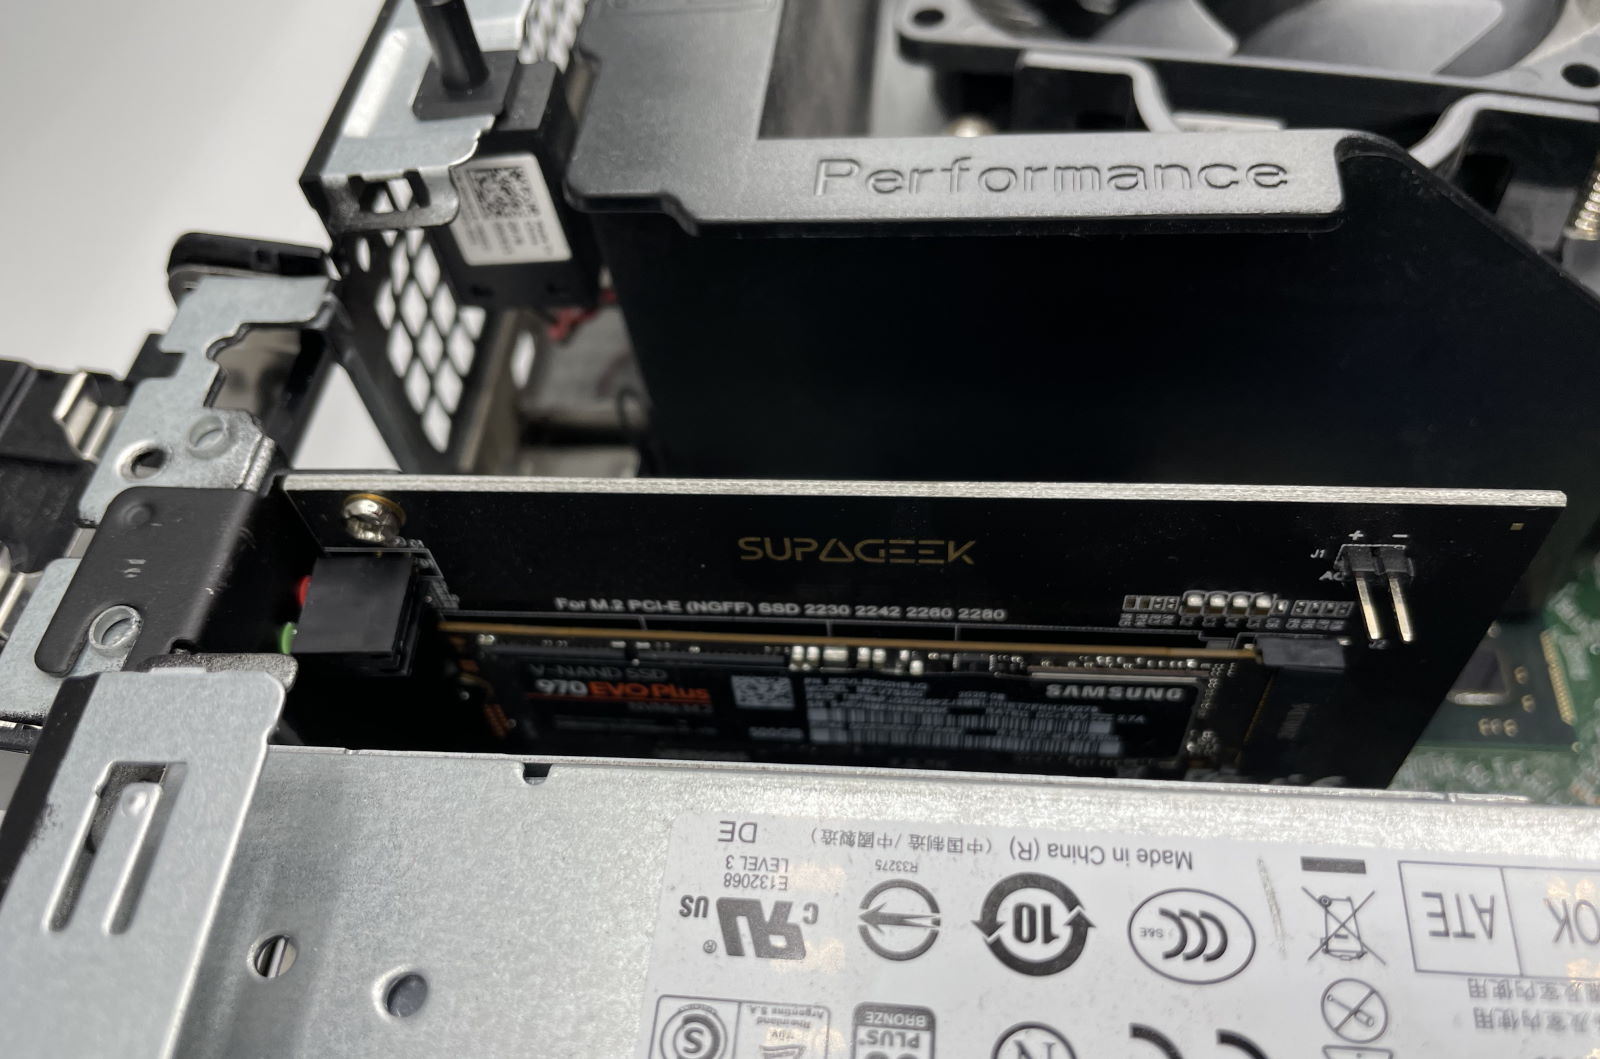
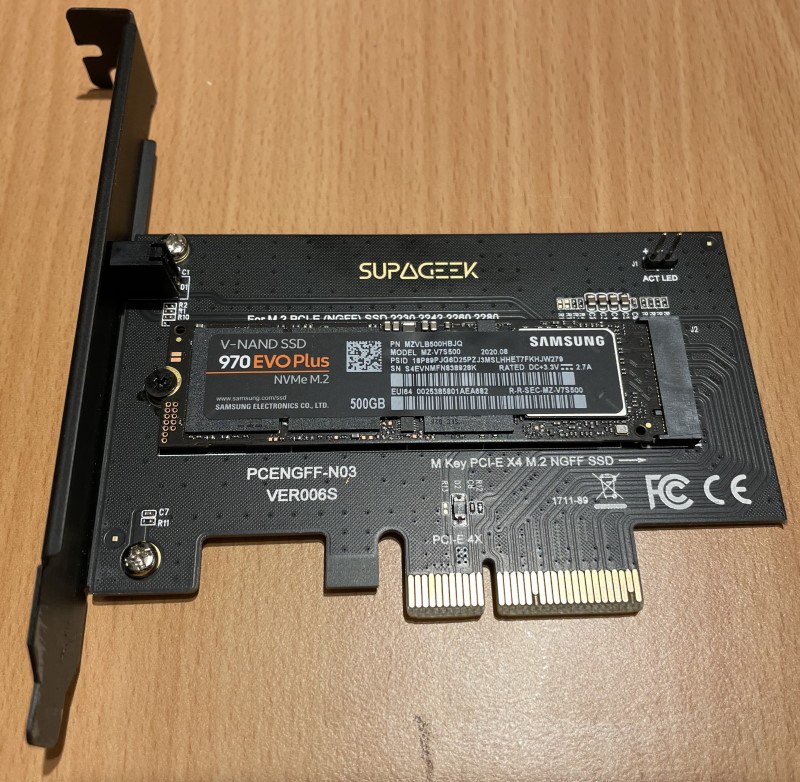
I used one of these cheap NVMe to PCIe adapters from Amazon to install the Samsung 970 EVO Plus SSD into one of the spare PCIe slots:
Additional Resources
During this process I gathered a number of additional resources which I am uploading here just in case you might find them useful:
- Dell Alienware Area 51 r2 Service Manual
- MSI MS-7862 Motherboard Schematic (Top)
- MSI MS-7862 Motherboard Schematic (Bottom)
- MSI MS-7862 Motherboard Technical Information
Conclusion
Overall, I think this is an amazing result. Being able to repair a corrupt BIOS with such a cheap bit of hardware from Amazon is brilliant. Given the number of machines that this has happened to I think Dell should be providing repair or replacement free of charge outside of the warranty period, but I can equally understand why they would choose not to.