
In an Office 365/Exchange environment it is possible to have many email aliases associated with your account and receive email on all of those addresses.
However sometimes it can be useful to determine which of those email addresses was used when the message is received and this information is not presented by default.
One way to achieve this is to use a transport rule on the message to modify the message in some way as to make the email address that the message was sent to easily identifiable.
Create an additional email alias to receive the mail
The first step in this process is to ensure the mailbox that you are going to be sending the message to has got an additional email address that you want to receive messages on. I used “testaddress@mydomain.com”.
Once you have created the alias and ensured you can receive email on it we can create the transport rule which will enable us to identify when messages are sent to that address.
Create an Office 365 Transport Rule to modify the message subject to make it identifiable
The next step is to create a transport rule to examine the message header so that the subject is modified to make the alias that the email was sent to easy to recognize.
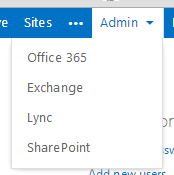
- Login to your Office 365 Admin portal and go to Exchange administration.
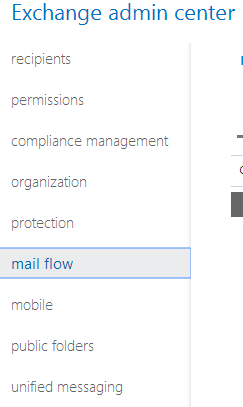
- Go into the “Mail Flow” section.
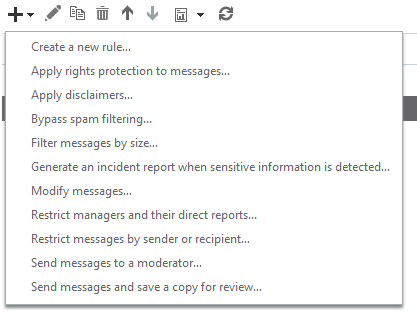
- Click the add button and select the option to create a new rule.
- The new transport rule window will be displayed.
- Give your transport rule an appropriate name
- Click the “more options” link at the bottom of the window.
- Under the “Apply this rule if…” option, select “A message header…” and then “Matches these text patterns”

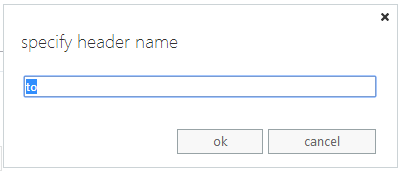
- Click on the “Enter text…” link and and enter the word “to” (without brackets) in the specify header name field and click OK.
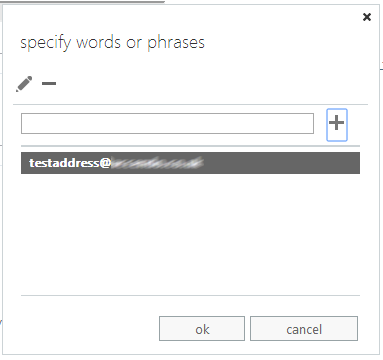
- Click on “Enter text patterns…” and enter the email address for the messages that you are trying to identify and click the plus symbol to add it, then click “ok”.
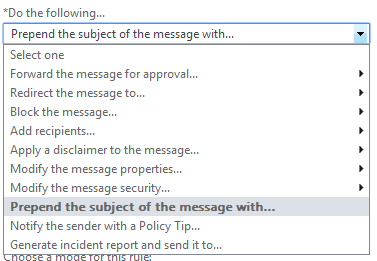
- From the “Do the following” menu option choose “Prepend the subject of the message with…”
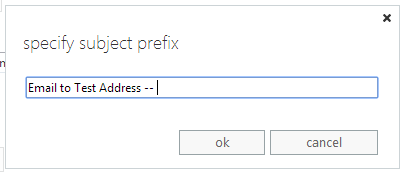
- Enter the text that you would like prepend to the message subject line. e.g.
- Add any additional conditions that you would like to apply and then click “ok”.
- Save the transport rule.
- Send an email to the address that you are trying to identify and you should see that the subject line has been amended to reflect your newly created rule.
You may find that when you send an email to the specified address immediately after creating the rule that it is not applied. I found that I had to wait for a few minutes before it started working.
vijayanand says
Nice info !!! I will be happy to know when you actually create transport rule in O365 it is getting created in Exchange transport servers or EOP ….. I blv its EOP …Please clarify
Paulie says
I don’t actually know – I didn’t look into it too much, I had this problem to solve and when I found the solution I implemented it and wrote it up for others to use, I did not investigate beyond that. If anyone else knows I would be interested also.
Lnz says
Great article, the exchange transport rules work well! We notice that it only works if the email is in the “to” field. Any idea how we can also support “cc” and “bcc” ?
Childbirth Classes Phoenix AZ says
I know this site provides quality dependent articles and extra data,
is there any other web page which presents such data
in quality?
Greg says
OK, but how do we do the opposite and remove the tag in the Subject say [secure] if we were to send encrypted emails
Paulie says
I don’t think you can as there is no action to modify the message subject, only the prepend option. But you could probably do it in Outlook using the other guide I wrote I would think. Not as good though.
David Kelly says
Exactly what I was looking for