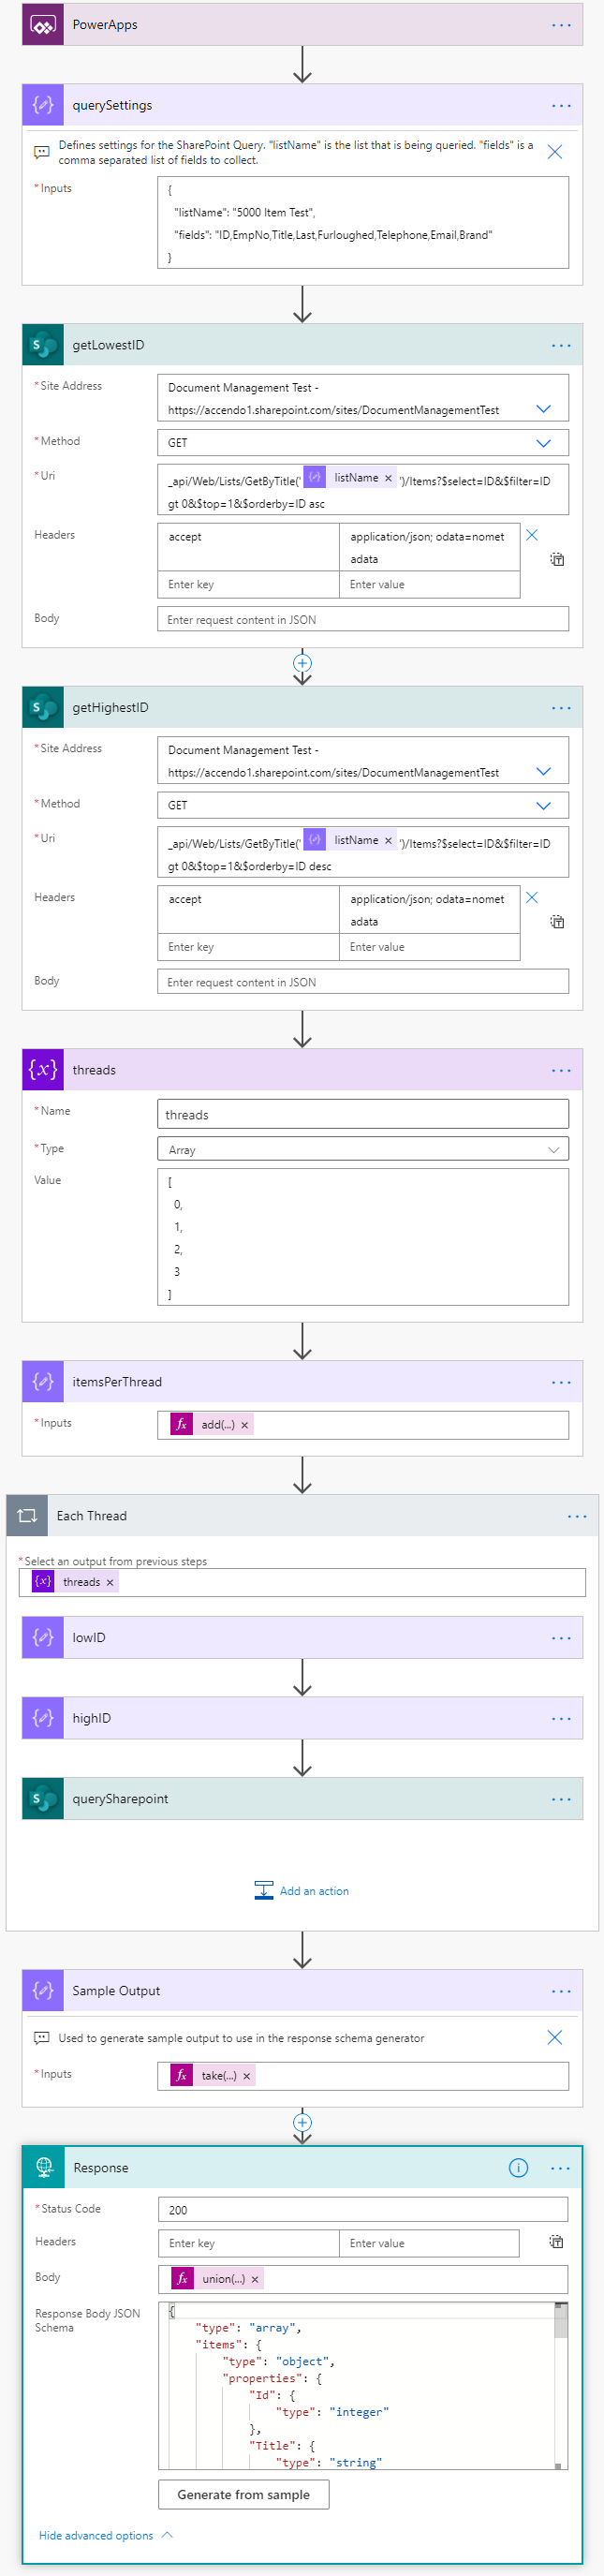
Power Automate does not have a function to extract numbers from a string. I’ve seen this requirement come up a few times in the Power Automate community forums so thought I would post the solution here. Here is an image of the flow:
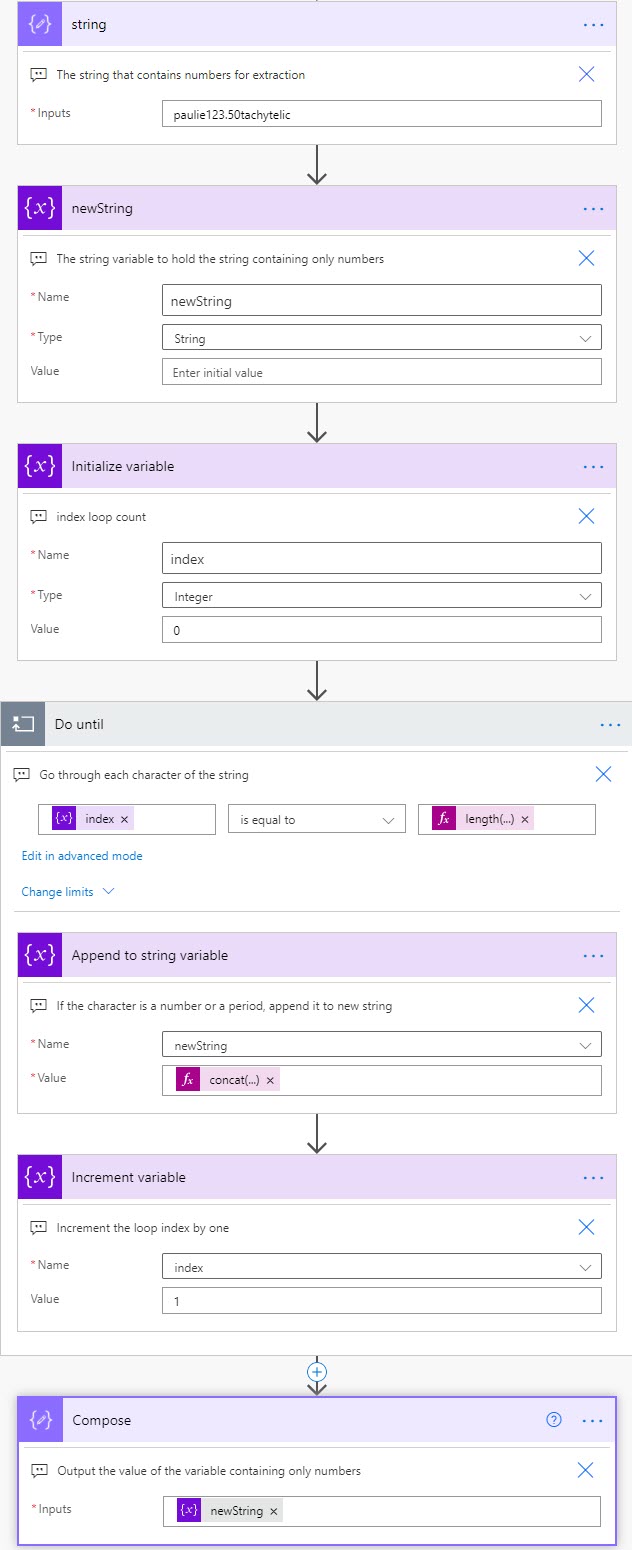
It works by creating a do until loop that looks at each character of the string that contains the number. In this case a compose step called “string”. If the character is equal to 0 to 9 or a period then it is appended to the variable called newString, otherwise it is discarded.
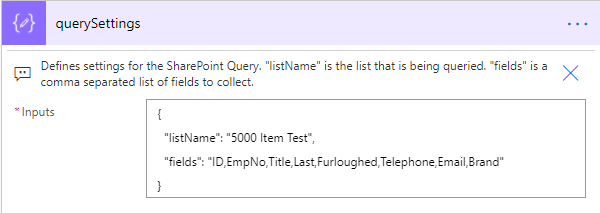
Most of the work happens in the append to string variable step, which contains the expression:
concat
(
if(equals(substring(outputs('string'), variables('index'), 1), '0'), '0', ''),
if(equals(substring(outputs('string'), variables('index'), 1), '1'), '1', ''),
if(equals(substring(outputs('string'), variables('index'), 1), '2'), '2', ''),
if(equals(substring(outputs('string'), variables('index'), 1), '3'), '3', ''),
if(equals(substring(outputs('string'), variables('index'), 1), '4'), '4', ''),
if(equals(substring(outputs('string'), variables('index'), 1), '5'), '5', ''),
if(equals(substring(outputs('string'), variables('index'), 1), '6'), '6', ''),
if(equals(substring(outputs('string'), variables('index'), 1), '7'), '7', ''),
if(equals(substring(outputs('string'), variables('index'), 1), '8'), '8', ''),
if(equals(substring(outputs('string'), variables('index'), 1), '9'), '9', ''),
if(equals(substring(outputs('string'), variables('index'), 1), '.'), '.', '')
)
This sort of flow can work well inside a solution as a child flow. You should be able to copy the flow from the image above quite easily. But you can also download the example above here.
Hopefully a function will be added to Power Automate which allows you to extract numbers from a string. But for now, I hope this helps.