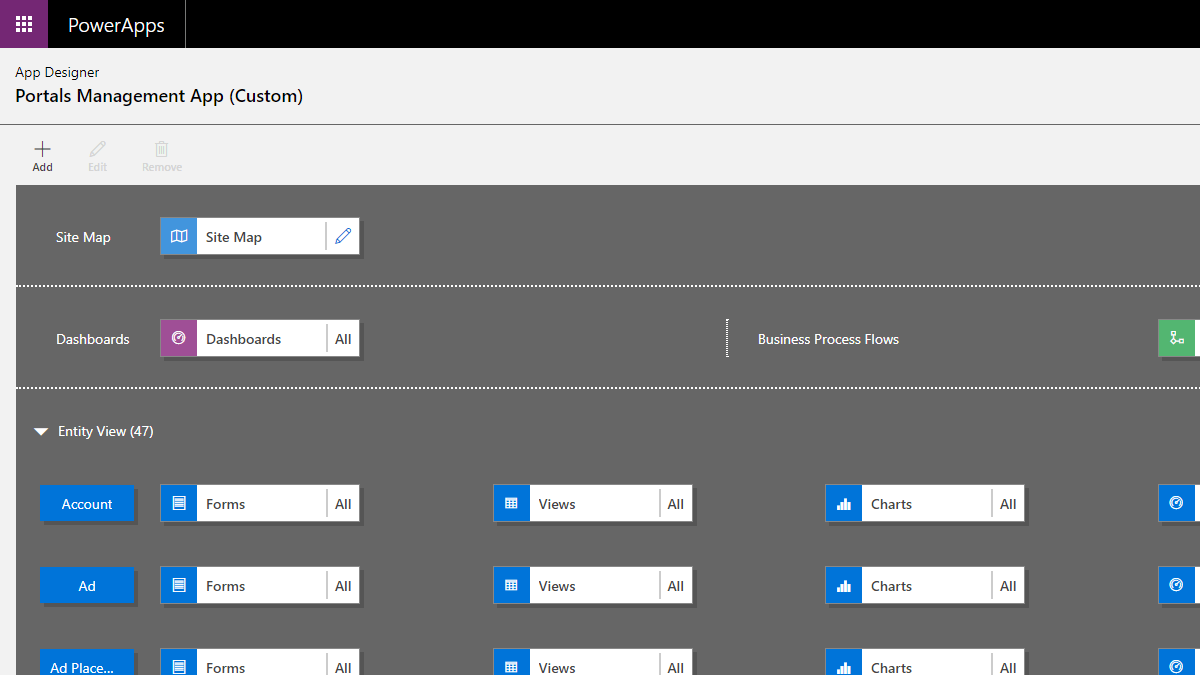
The 5000 item view limit of SharePoint lists has been a stumbling block for a long time. Fortunately we can overcome the limit using Microsoft Power Automate.
This is a part of a series of blog posts which cover retrieving data from SharePoint using Power Automate to read all about the methods I have used, and the best method for you to use, read this post first:
The many ways to retrieve more than 5,000 items from a SharePoint list using Power Automate
The post above also includes links to my sample data and the exported flow.
The methods described in this post will use no premium features whatsoever. For reference my sample data consists of 17,000 records with 7 columns, and looks like this:
Get more than 5000 Items from a SharePoint List – Simple Method
Before you continue, you need to understand a couple of things:
The first thing is that the 5000 limit, cannot be overcome, that is the maximum number of records that you can retrieve in a single request from a SharePoint list using the “Get Items” action or the SharePoint Rest API.
The second thing is that the wording in the “advanced options” of the Power Automate “Get Items” action is misleading:
The default setting of the “Top Count” option says “Total number of entries to retrieve (default = all)”. To my thinking, this means it would get every item in the list! But in actual fact it retrieves just 100 records.
You can set top count to any value up to 5000, but no more. The field will accept a larger figure, but it will not retrieve more than 5000 items.
So getting 5,000 items is easy, how about the rest? To get every item in the list, a loop is required that runs until there are no more records.
Using a Do Until Loop to get all records
If performance does not matter to you, use this method. It is the easiest method to implement. If you are using this flow to return a lot of data to an interactive process, this method is terrible. Examples of interactive processes could be:
- Returning SharePoint list data to a PowerApp.
- Returning JSON data to a web request via the HTTP connector.
- Anything that has an end user waiting for a result.
If your flow is returning data to a user, consider using the SharePoint API instead, which is covered in detail in this post:
If your flow is non-interactive, then this method is fine. Here is how to do it:
Declare some variables
Use the “Initialize Variable” action to declare a bunch of variables to control your loop and store some data:
- arrItems – an array to store data from the SharePoint list
- intID – an Integer variable to store the ID of the last collected record from SharePoint
- boolEmpty – A Boolean that controls the do until loop based on the response from SharePoint
Create the Loop
Create a loop with the control action “Do until”
Configure the do until loop to terminate when boolEmpty equals true:
or edit it in advanced mode and paste the following code:
@equals(variables('boolEmpty'), true)
Now get the items from SharePoint with the “Get Items SharePoint” action and add a filter query:
ID gt @{variables('intID')}
and set the Top Count to 5000
The next step is optional, but I like to include it. The Get items action brings in a LOT of metadata fields from SharePoint, if you don’t need these fields, filter them out. Trim the list down using the Select action:
Reducing the field count is important because it:
- Significantly improves performance by reducing the amount of data.
- Removes potentially sensitive information.
- Makes the data easier to comprehend, by being relevant.
With the sample data I am using, using the Select action halved the execution time of the flow.
Next use a compose action to union the results from the output of the select action with the arrItems array:
union(variables('arrItems'), body('Select'))
Now use the Set variable action to set arrItems to the outputs of the compose action above:
Next, use the Set variable action to set the variable intID to the last item collected by the get items action. This is used as the filter for the subsequent execution of the loop.
last(body('Get_items')?['value']).ID
Finally, set the value of boolEmpty using the set variable action again:
empty(body('Get_items')?['value'])
Important: Now click the ellipsis on the Set boolEmpty action and choose “configure run after”:
The reason to allow this action to run if the previous action has failed is because a failure on the final batch of records is expected, because there will be no results.
Process your final result set
Now your do-until loop is at the end, and arrItems will contain every item in your list. You can now add any actions required to manipulate the entire array contents or send the data back to the calling process. In my example I am sending the data back to a PowerApp, so I am using the response action:
The entire flow without the select action looks like this (click to view full image!):
and here is the flow with the select action included:
This all works nicely, but if you want more speed and to simplify the flow, check out this post on using the SharePoint API in a Flow instead.