I have already covered the subject of CSV Parsing in Power Automate in a previous blog post and two YouTube videos. That content has been really useful to many thousands of users already.
Despite the success and great feedback, I’ve always felt there is room for improvement to this common, yes critical task. So I have come up with something that is both faster, and incredibly easy to use.
Microsoft recently added the ability to use C# code in custom connectors. This functionality has enabled me to create a custom connector that makes working CSV files incredibly easy in both Power Automate and Power Apps.

The problem with existing solutions
- In depth knowledge of Power Automate actions and expressions are required.
- Lots of work required to build for CSV files with many columns.
- Do not really fit with the low-code/no-code philosophy.
A new custom C# connector for Parsing CSV Files
By creating a custom connector written in C# I have been able to build a solution that can deal with Parsing CSV Files in a single action. Key benefits:
- A single action will parse your entire CSV file and return JSON.
- Unlike 3rd Party connectors:
- The data will never leave your environment.
- You will not have to pay a subscription to use it on an ongoing basis.
- Works in both Power Automate and Power Apps.
- Easily handles Windows or Unix Style line endings.
- Can handle complex CSV files which contain commas within a field.
- Allows you to specify:
- Custom Delimiters.
- Custom column headers.
- Specify how many rows of data to skip in the incoming text file.
- Accepts base64 or text input
How does it work
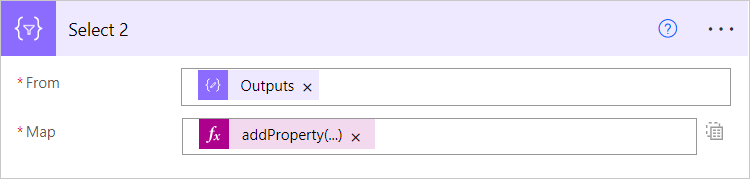
The connector is incredibly easy to use, here is a screenshot:

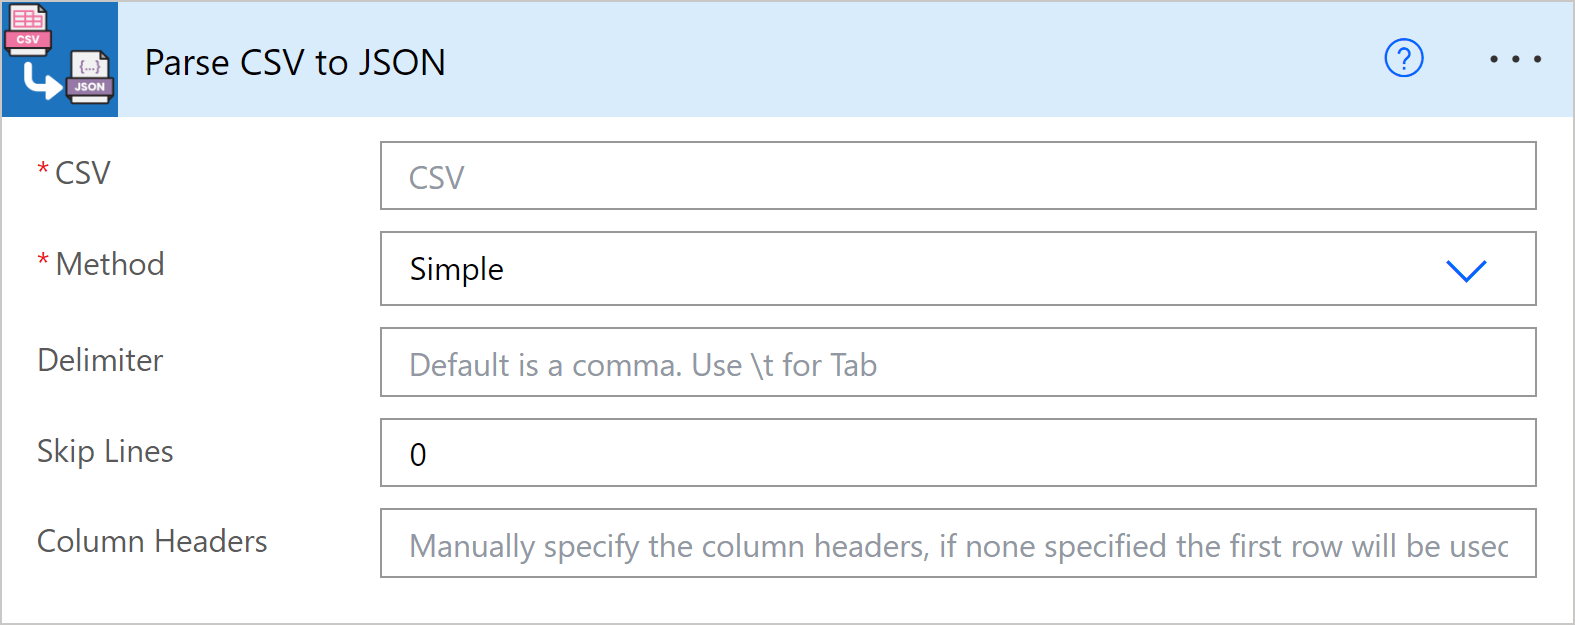
It accepts five input parameters:
- CSV – Provide the CSV Content in Text or Base64 format.
- Method
- Simple – This option should be used for the majority of files, it provides the fastest performance.
- Regular Expression Based – This option can be used for CSV files that contain commas or quotes within the CSV content that are not being used to delimit the data.
- Delimiter – If left empty, this will default to a comma, but you can use any character or string that suits you.
- Skip Lines – Specify the number of rows to skip from the incoming CSV file before processing data.
- Column Headers –
- If left empty the first row of data will be used as the headers
- Specify you own headers, e.g. “Column1, Column2, Column3”.
The output will be a JSON array that represents your CSV Data. But you will also find three additional elements in the headers:
- rowcount – Will tell you the number of records returned.
- processingtimemillis – Tells you how many milliseconds it took to process the CSV.
- base64input – Tells you if the connector received base64 input or not.
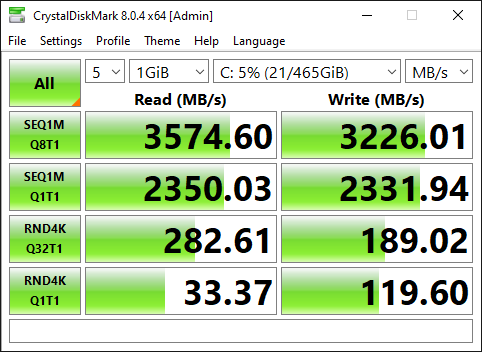
The amount of time required to process the request is important as a custom connector has a limit of 5 seconds for execution.
I have tested with a CSV containing 30,000 rows and 7 columns of data and it took only 255 milliseconds to process, so you could easily handle a very large CSV file.
Licensing Requirements
In order to use a custom connector in either Power Automate or Power Apps you must have a premium license. There’s no getting around that, so if you don’t have either of those, I would encourage you to use one of my previous solutions.
Purchase Connector
Save yourself a tonne of time and simplify your workflows by purchasing this connector below.
How do I install the connector?
Once your purchase is complete, you will be emailed a solution which contains:
- The Custom Connector for use in your environment.
- A sample Power Automate Flow that shows how to use the connector.
- A sample Power App that shows how to use the connector.
- A link to an unlisted YouTube video guiding you how to install.
Simply import the solution and the connector will be available in your environment.
You will automatically receive any fixes or enhancements I create for one year after your purchase.