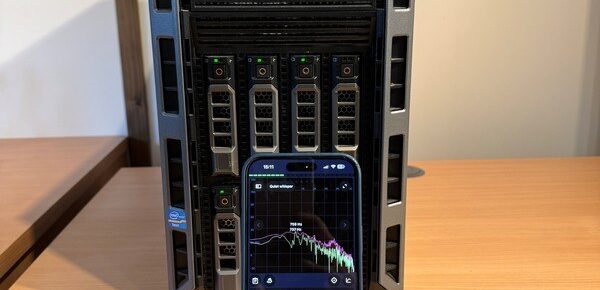
Warning: imagecreatefromstring() [function.imagecreatefromstring]: Empty string or invalid image in /var/www/vhosts/tachytelic.net/httpdocs/wp-includes/media.php on line 258

Archive for How To

HP Direct PDF printing is a great cross platform driverless printing mechanism which I have used for a number of customers with great results.

A common problem with Direct PDF printing is that it is not possible to include any printer control commands such as tray calls within the PDF and lots of people have been asking how to do this – I checked with HP Technical support and was told it is not possible.

It is possible however to setup a print job with PJL commands and include the PDF documents within that job. The key being to set the printer language/personality to PDF and then using the UEL (Universal Exit Language) command to issue more control commands. After a bit of trial and error I found that this is actually quite straightforward, and thought I would post the code as I was not able to find any working examples:


ESC%-12345X@PJL
@PJL JOB NAME = "paultest2.pdf" DISPLAY = "Printing & Stapling paultest2.pdf"
@PJL SET OUTBIN=OPTIONALOUTBIN1
@PJL SET PROCESSINGTYPE="STAPLING"
@PJL SET PROCESSINGOPTION="LEFT_1PT_ANGLED"
@PJL SET MEDIASOURCE = TRAY3
@PJL ENTER LANGUAGE = PDF

After setting up the job with the above, you can then add the PDF code. After the PDF you either need to end the job or specify more further printing control. In my example I am printing another PDF document right away within the same job but from a different tray, like so:


ESC%-12345X@PJL
@PJL SET MEDIASOURCE = TRAY4
@PJL ENTER LANGUAGE = PDF

Then follow this with more PDF data and then end the job like this:


ESC%-12345X@PJL
@PJL RESET
@PJL EOJ NAME = "paultest2.pdf"
ESC%-12345X

In this example the two PDFs are also being stapled together and the status display on the printer is also updated to show what document is being printed.

All of the above was tested using a HP Laserjet P4015N with a 500-Sheet Stapler/Stacker(CB522A). Although it contains no references to PDF printing, the best reference I have found is this document from HP:

http://h20000.www2.hp.com/bc/docs/support/SupportManual/bpl13208/bpl13208.pdf

In production I am doing all of the PJL wrapping via a korn shell script which I’ve tested from IBM AIX, Ubuntu and Sco Openserver 5.0.7.

Categories : How To, Technical Posts
Comments (14)

Dell Openmanage Server Administrator is a really useful tool for configuring and monitoring server hardware but it lacks built in E-Mail alerting or notifications.

The software is capable of calling external programs or scripts when a server alert is triggered so I have written a simple script that provides E-Mail alert functionality.

There are a couple of scripts out there that do similar, but I wanted something self contained and capable of using SMTP Authentication with an external relay.

The other problem with OMSA is that you need to go into each individual alert to configure the settings which can be very time consuming, I wanted a way to add them all automatically as I am going to install the script on a number of servers.

Once you have downloaded and extracted the zip file you will need to edit the variables at the top of the script to make them appropriate for your environment:

The variables at the top define the e-mail settings and are hopefully self explanatory. If a remote SMTP server is not specified the local machine will be used to send the E-Mail.

Below these you can to decide what events you want to be notified of, just comment out any that you aren’t interested in, e.g:

AlertConfig(0)="powersupply|Power supply failure"
AlertConfig(1)="powersupplywarn|Power supply warning"
'AlertConfig(2)="tempwarn|Temperature warning"
'AlertConfig(3)="tempfail|Temperature failure"

I have included every alert available in OMSA 6.2 on a PE T710, some of these alerts won’t be available on older versions or machines.

After you have configured the script, I suggest you test that the E-Mail options by running:

cscript dellalert.vbs testemail

You should receive a test e-mail, if not something isn’t working properly.

When you have successfully tested e-mail, configure OMSA to send alerts by running:

cscript dellalert.vbs setup

You will then see the script go through and setup all the appropriate alerts as per your settings. This process can take a couple of minutes as the “omconfig” command takes a while. This step will not work if you do not have OMSA installed.

Once this is done you should be able to see that the script has been added into OMSA:

Now you need to generate some real alerts to test the script properly. How you do this will depend on the capabilities of your server, I was able to disconnect the redundant power supply and have an alert generated almost immediately. I think opening the case will also generate an event, but I am not sure as I didn’t test. Hopefully you should get something like this in your Inbox:

Update: There is a new version of this script which is written entirely in Powershell and will work with Windows Server Core etc.  Please visit :

http://www.tachytelic.net/2011/09/dell-openmanage-server-administrator-e-mail-alerts-updated-powershell-script/

Download both versions by following the PayPal link.

GBP 2.95 / Download


Today I needed to FTP some files to a site that I have used on and off for a number of years. Because I have recently installed Windows 7 I needed to setup the site again in my FTP Client, Core FTP.

Although my old machine still has the connection setup I was not able to see the cached/saved password. Although it is possible to export the sites, the password remained encrypted and I wanted to document the actual password.

There are a lot of tools, some free and some which you have to pay for which will recover the cached FTP password for you. Some of these looked a bit questionable and as FTP is an entirely unencrypted service I thought it should be easy to sniff the password out of the FTP traffic itself.

Turns out that it really is very easy and the saved password can be retreived instantly using netmon.

So here is how to do it.

Create a new capture filter in netmon and enter the following:

tcp.Port==21 and property.TCPPayload.contains("PASS")

Should look like this:

Netmon FTP Password Capture

Then click on the start button to begin capture. Then open your FTP client which contains the cached password and connect to the FTP server.

As soon as you have made a succesful connection switch back to netmon and stop the capture. You should then be able to see the FTP password in clear text in the capture window, something like this:

I spotted a lot of posts from people trying to recover or export their saved FTP passwords from CoreFTP and CuteFTP and many programs are designed specifically for this purpose. This is quick and simple and does not depend on any 3rd party software and should work with any FTP client.

Hope this helps someone.

Categories : How To, Technical Posts
Comments (3)

Today a customer started to get a lot of their e-mails bounced. In fact they could not even e-mail me to let me know about the problem as my own mail servers were rejecting their messages.

The reason for this was because their IP address had been listed on the CBL.

I had a poke around the server and everything seemed to be in good order; patched up to date, virus scanner had nothing interesting to report, netstat did not show any abnormal connections and Exchange queues seemed normal. So I assumed that the problem must be coming from one of the network PCs.

This customer has a dual nic SBS 2003 Standard edition server, not my preferred set-up, but the system had to be implemented in this way to fit in with existing infrastructure. It is not possible to see what traffic is passing through the NAT gateway on RRAS with the built in tools, but Microsoft Netmon 3.1 should be able to show up any strange network traffic. I installed it and ran the following filter:

Tcp.dstport == 25 and ipv4.Address != 192.168.200.1

192.168.200.1 is the IP address of the internet facing NIC on the SBS machine.

Within a couple of minutes this filter showed all the machines on the network sending SMTP based traffic except for the SBS server itself. Fortunately there was only one. I took remote control of the machine and from the command line ran:

netstat -ano |find ?��Ǩ?�:25?��Ǩ�?

The output of this command showed me the local processes which were attempting to communicate with other hosts on port 25 and gave me confirmation that this PC was definitely infected with some kind of mass mailing virus or worm. Killing the process listed by the netstat command stopped the mass mailer and gave some breathing space to find the cause of the problem.

Turns out the machine in question had its virus checker disabled. So I turned it back on and ran a full scan which turned up almost 6,000 files infected with W32/MyDoom.

Once the problem had been found it was easy to sort, but because I have so few customers with this set-up it had not occurred to me how little visibility you get over network traffic with the SBS 2003 standard edition tools.

The joys of travelling sales laptops :D

Categories : How To, Technical Posts
Comments (1)